Frequently Asked
FAQs
- Near Dupe FAQ
- FAQ - Litigation Chron and Evidence Dashboard
- Export FAQ
- How to do a Hard Refresh
- FAQ: What date is displayed in the date field of the grid view?
- FAQ: How do I resolve endorsement errors?
FAQs
Nextpoint’s Near Dupe feature helps identify documents that are highly similar but not exact duplicates, allowing reviewers to quickly recognize overlapping content while preserving meaningful differences. By grouping related documents and assigning similarity scores, Near Dupe analysis helps reduce review volume, improve organization, and streamline document review workflows.
How does our Near Dupe algorithm work?
Nextpoint’s near-duplicate identification tool analyzes document content to identify files that are highly similar but not exact copies. This allows reviewers to quickly recognize overlapping content while still preserving meaningful differences between documents.
- Content Analysis Using Shingling: Each document is broken into overlapping segments of text, creating a structured representation of its content. Documents that share many of these segments are more likely to be considered near-duplicates.
- Similarity Measurement with Jaccard Similarity: These document representations are compared using Jaccard similarity to calculate how much content overlaps between documents. This method identifies high similarity even when documents are not identical.
- Efficient and Accurate Processing: Near-duplicate detection is designed to scale efficiently across large document sets, helping reduce review volume without sacrificing accuracy.
- Configurable Sensitivity: Similarity thresholds may be adjusted to meet the needs of a specific matter, allowing near-duplicate results to be tuned based on review strategy.
Using Nextpoint’s near-duplicate feature helps streamline document review by reducing redundancy, improving organization, and saving both time and cost.
How are scores calculated? What do they mean?
Near-duplicate scores represent the degree of similarity between documents, based on Jaccard similarity calculations. Scores reflect how much content overlaps between documents and are evaluated against a defined threshold to determine whether documents qualify as near-duplicates.
What is considered a Standard Near Duplicate Analysis? What makes it more custom?
A Standard Near Duplicate Analysis evaluates documents across the database to identify groups of files that share a high degree of similarity. Related documents are associated at the document level and assigned similarity scores to help guide review decisions.
Factors that may result in a more customized Near Duplicate Analysis include, but are not limited to:
- Targeted comparisons between specific data sets
- For example, comparing Folder A to Folder B where one data set serves as the primary reference
- Reviewing results in bulk versus document-by-document
- For example, viewing related document groupings within a grid view
- Review strategies focused on reducing review volume
- For example, setting aside documents produced to you when substantially similar versions have already been reviewed from your own data
Near Dupe FAQ
Overview
The Chronology feature helps teams organize and analyze case information by connecting Facts, Issues, and People to supporting documents. This article explains how to create, manage, search, and export Chronology data, outlines permission-based access, and answers common questions about bulk actions, evidence support, and related workflows.
Common Questions
-
Can issues, facts, and people be connected to indicate relationships? (ex: showing that multiple facts support a specific issue)
The ability to directly connect issues, facts, and people to one another within the Chronology is not currently supported. Planned enhancements include the ability to group facts by issue and associate people with related facts directly within the Chronology tab.
-
Can I connect issues, facts, and people to transcript testimony?
Issue, fact, and people coding is currently limited to document evidence. Support for connecting these elements to transcript testimony is under evaluation.
- Issues can already be connected to transcript testimony through Transcript Issues, which are configured via More > Settings > Transcripts. This functionality exists separately from the Chronology feature.
-
Are these features available in the Discovery suite?
Chronology features are not currently available in Discovery. However, users can begin organizing their case early by coding Key Documents and Issues, which are exchanged to Litigation and reflected in the Chronology.
Facts and People can be referenced in Discovery by using custom fields and exchanged to Litigation for further refinement.
Additional notes on transferring from Discovery:
- A “Key Document” single checkbox custom field created in Discovery will exchange to Litigation and map to the built-in Key Document field.
- Responsive Issues coded in Discovery will exchange to Litigation and map to Document Issues in the Chronology and Dashboard.
- Facts and People do not currently exchange automatically. As a workaround, users may create custom picklist fields in Discovery and exchange them to Litigation, then update the values using the built-in fields.
Fact, Issue, and People Management
-
Which user permission levels can access and manage facts, issues, and people?
- Advanced users can create, edit, and delete facts, issues, and people in the Chronology and at the document level.
- Standard users can view the Chronology and apply existing facts, issues, and people to documents.
- Basic users can view the Chronology and see existing coding applied to documents.
- View-only users cannot access the Chronology or apply coding.
-
Where did my issues go in the document coding panel?
Issues are now located in the Case Connections section of the document coding panel. -
Can I exchange Responsive Issues from Discovery to Litigation?
Yes. Responsive Issues in Discovery exchange to Litigation and populate Issues within the Chronology. -
How can I create, edit, or delete facts and people?
-
To create:
- At the document level, navigate to Case Connections, select the appropriate category, and choose Create New.
- In the Chronology tab, switch to the relevant grid and click Create New.
-
To edit:
- At the document level, select the applied item, make changes in the modal, and click Save Changes.
- In the Chronology tab, select the item from the grid and save updates.
-
To delete:
- In the Chronology tab, select the item and choose Delete, then confirm the action.
-
To create:
-
Do I need to manually enter dates when creating facts?
Yes. Dates must currently be entered manually. -
Can facts and people be color-coded?
Yes. Colors can be assigned during creation. If no color is selected, a default gray tone is applied. -
Can facts, issues, and people be restricted from use?
No. However, only Advanced users can create, edit, or delete these items. Advanced and Standard users can apply them to documents.
Bulk Coding & Search
-
Are facts and people available in bulk actions?
Facts and People are not currently available in Bulk Actions to help ensure accurate and intentional coding. -
Can I search for facts, issues, and people?
- Fact:"fact name"
- Issue:"issue name"
- People:"person name" OR Person:"person name"
- People:"person name" AND Issue:"issue name"
-
Are facts and people available in Advanced Search or Filters?
Issues are available in Advanced Search and Filters. Facts and People are not currently included.
Key Documents
-
Will the Key Document field be added to Discovery?
Not automatically. However, Discovery databases using a “Key Document” custom field can exchange data to Litigation and map to the built-in Key Document field. -
What if I had a Key Document field before deployment?
Existing Key Document fields in Litigation are automatically mapped to the new built-in Key Document field. -
How do Hot Document fields exchange from Discovery?
- Rename the Hot Document field to Key Document before exchange.
- Or, after exchange, search for hot_document:* and apply the Key Document field via bulk action.
-
How do I search for Key Documents?
- key_document:true
- -key_document:true
Exports
-
What is included in CSV exports?
All fields displayed in the Facts, Issues, and People grids are included in their respective CSV exports. -
What if I need a visual timeline?
While there is no built-in timeline visualization, Nextpoint Trial Services can assist in transforming fact chronologies into visual timelines. -
Why are document IDs separated by spaces in exports?
IDs are formatted for easy copy-and-paste searching using id:(# # # #).
Evidence Dashboard
-
Who can access the Evidence Dashboard?
Advanced and Standard users can access and use the Evidence Dashboard. -
Can I customize dashboard cards?
Not at this time. -
What is an unsupported fact?
An unsupported fact does not have document evidence associated with it. -
Are Most Viewed Documents user-specific?
No. This data is database-wide.
Infinite Scroll for Transcripts
-
Will infinite scrolling affect existing highlights or designations?
No. All existing designations and issue markups are preserved. -
Can users highlight partial lines?
No.
View related support articles:
Facts, Issues, and People
Litigation Chronology Tab
Evidence Dashboard
FAQ - Litigation Chron and Evidence Dashboard
This FAQ answers common questions about exporting data from Nextpoint, including native files, placeholders, confidentiality stamps, export ordering, PDF behavior, and export template setup.
Export Content & Formatting
This typically occurs when the export template is not configured to include native files or placeholders.
- Update the PDF Export Template :
- Select Use native placeholder in lieu of document images in Step 2
- Select Include under Original Files in Native Format
- Select the Make Smart Exceptions checkbox
Placeholders are controlled through endorsement templates.
- Add file extensions to the endorsement template before stamping.
- In the Numbering Exceptions section, specify file extensions. By default, templates include
.xl*,.ppt*, and.csv*.
- In the Numbering Exceptions section, specify file extensions. By default, templates include
Confidential stamps are applied at the time of endorsement.
- If documents were endorsed before the confidential stamp was added, you will need to remove the endorsement and re-endorse the documents for the stamp to appear.
Export Ordering & Structure
To export documents in chronological order, follow these steps:
- Locate the document set to include in your export.
- Select All documents using the top-left dropdown.
- Click Bulk Actions.
-
Add the documents to a folder for export.
- Recommended: Enable Email Family to include related documents.
- Under Choose order, select Date & Family to maintain chronological order and keep families together.
- Click Update.
- Create an export template that names files by folder order.
- Export the folder using the three-dot menu and select your template.
From the document viewer, open the three-dot menu and select Export This Family.
Enter an export name, configure your options, and click Export.
Export Templates & Load Files
Export templates define how images, text, natives, and load files are handled.
Create templates in Discovery via Settings > Export/Exchange, or in Litigation under More > Settings.
Templates can be reused to ensure consistent export formatting.
Detailed instructions for exporting a load file or index are available here .
PDFs & Search Behavior
PDFs generated by Nextpoint contain document text but are image-based. Searches will locate the correct page, though terms may not be highlighted.
Including text files in your export template provides a searchable alternative where search terms are highlighted.
Exporting as individual PDFs creates one PDF per document, including attachments.
Select documents, choose As Individual PDFs, select an export template, and click Export
Export FAQ
Some updates to the Nextpoint application require you to refresh your browser in order to pick up the latest changes.
Google Chrome
- Windows: Press Ctrl + F5
- Mac: hold Cmd + Shift and then press R
- You can also hold Shift and click Refresh button
Firefox
- Windows: Press Ctrl + F5
- Mac: hold Cmd + Shift and then press R
Safari
- Mac: On the menu go to
Safari >Empty Cache, or press Opt + Cmd + E
Internet Explorer/ Edge (Windows)
- Windows: Press Ctrl + F5
How to do a Hard Refresh
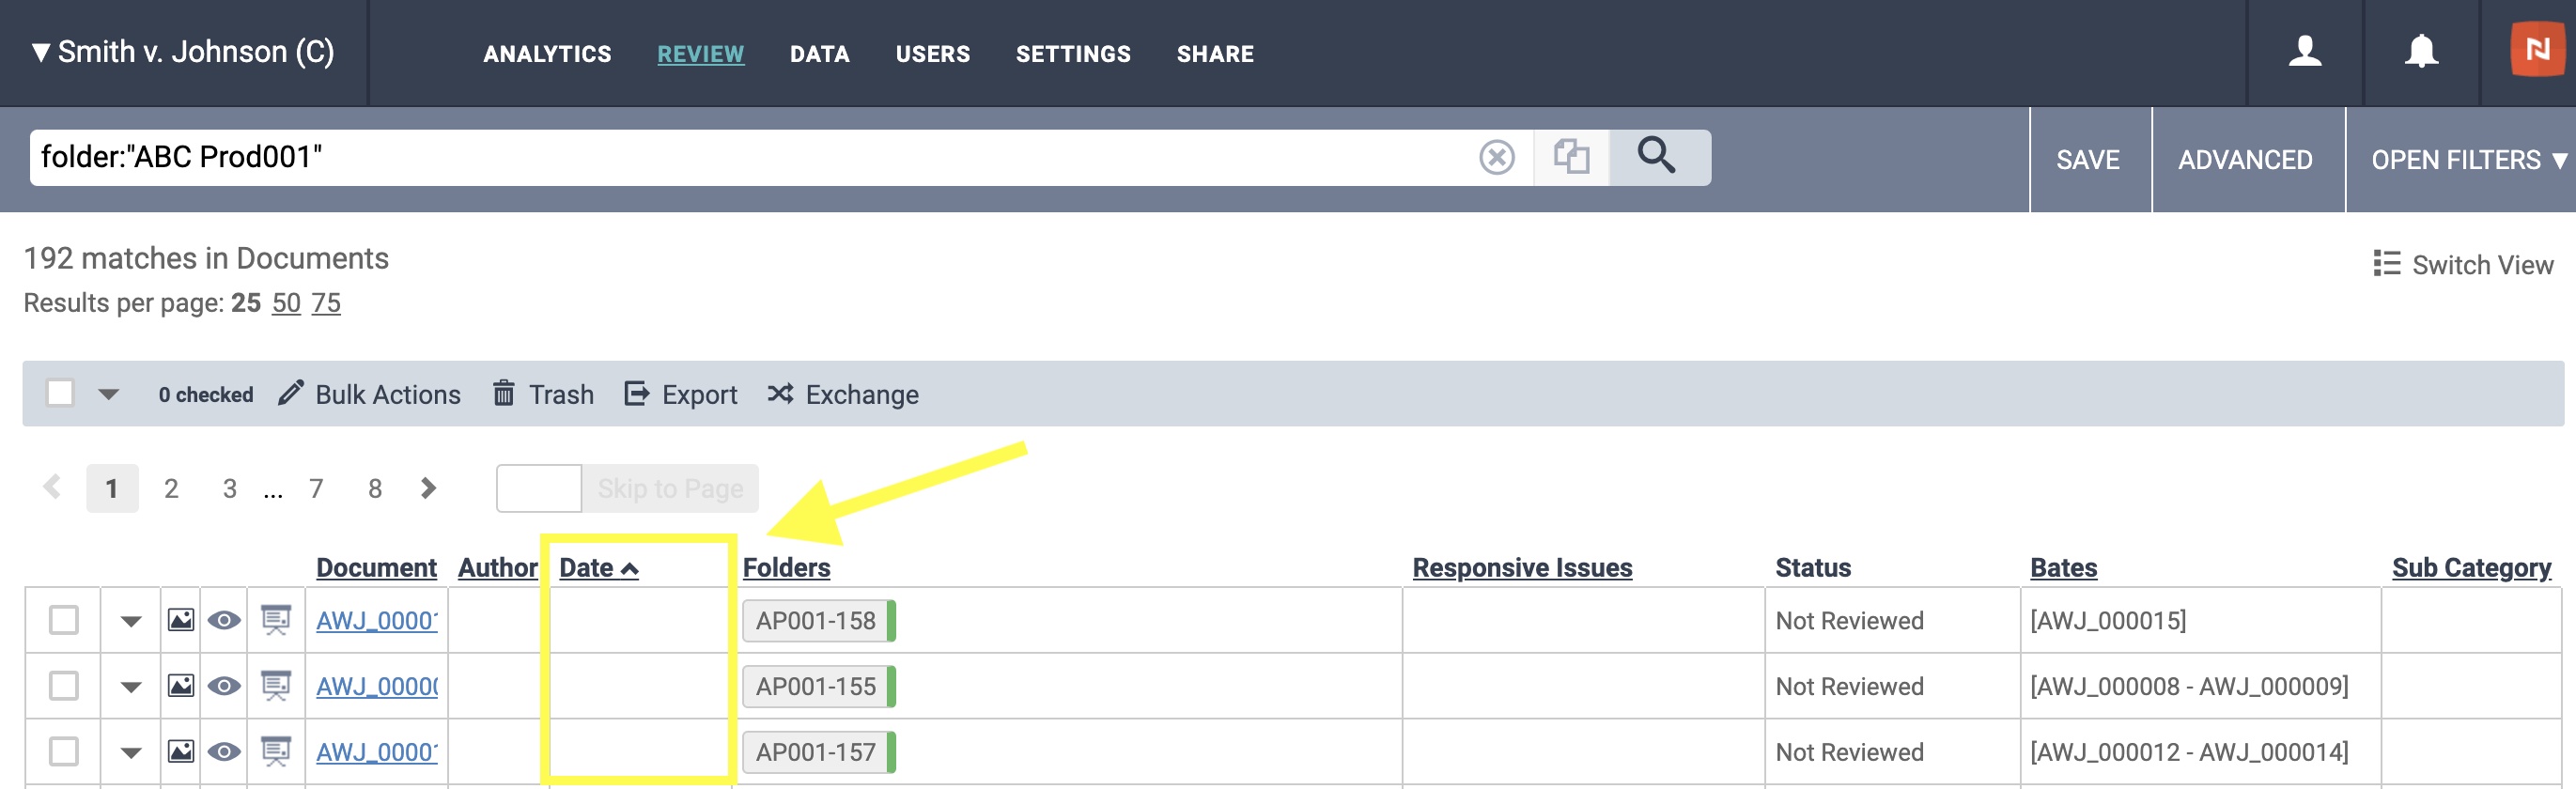
When you are looking at the grid view and you see the "Date" field, where does that value come from?
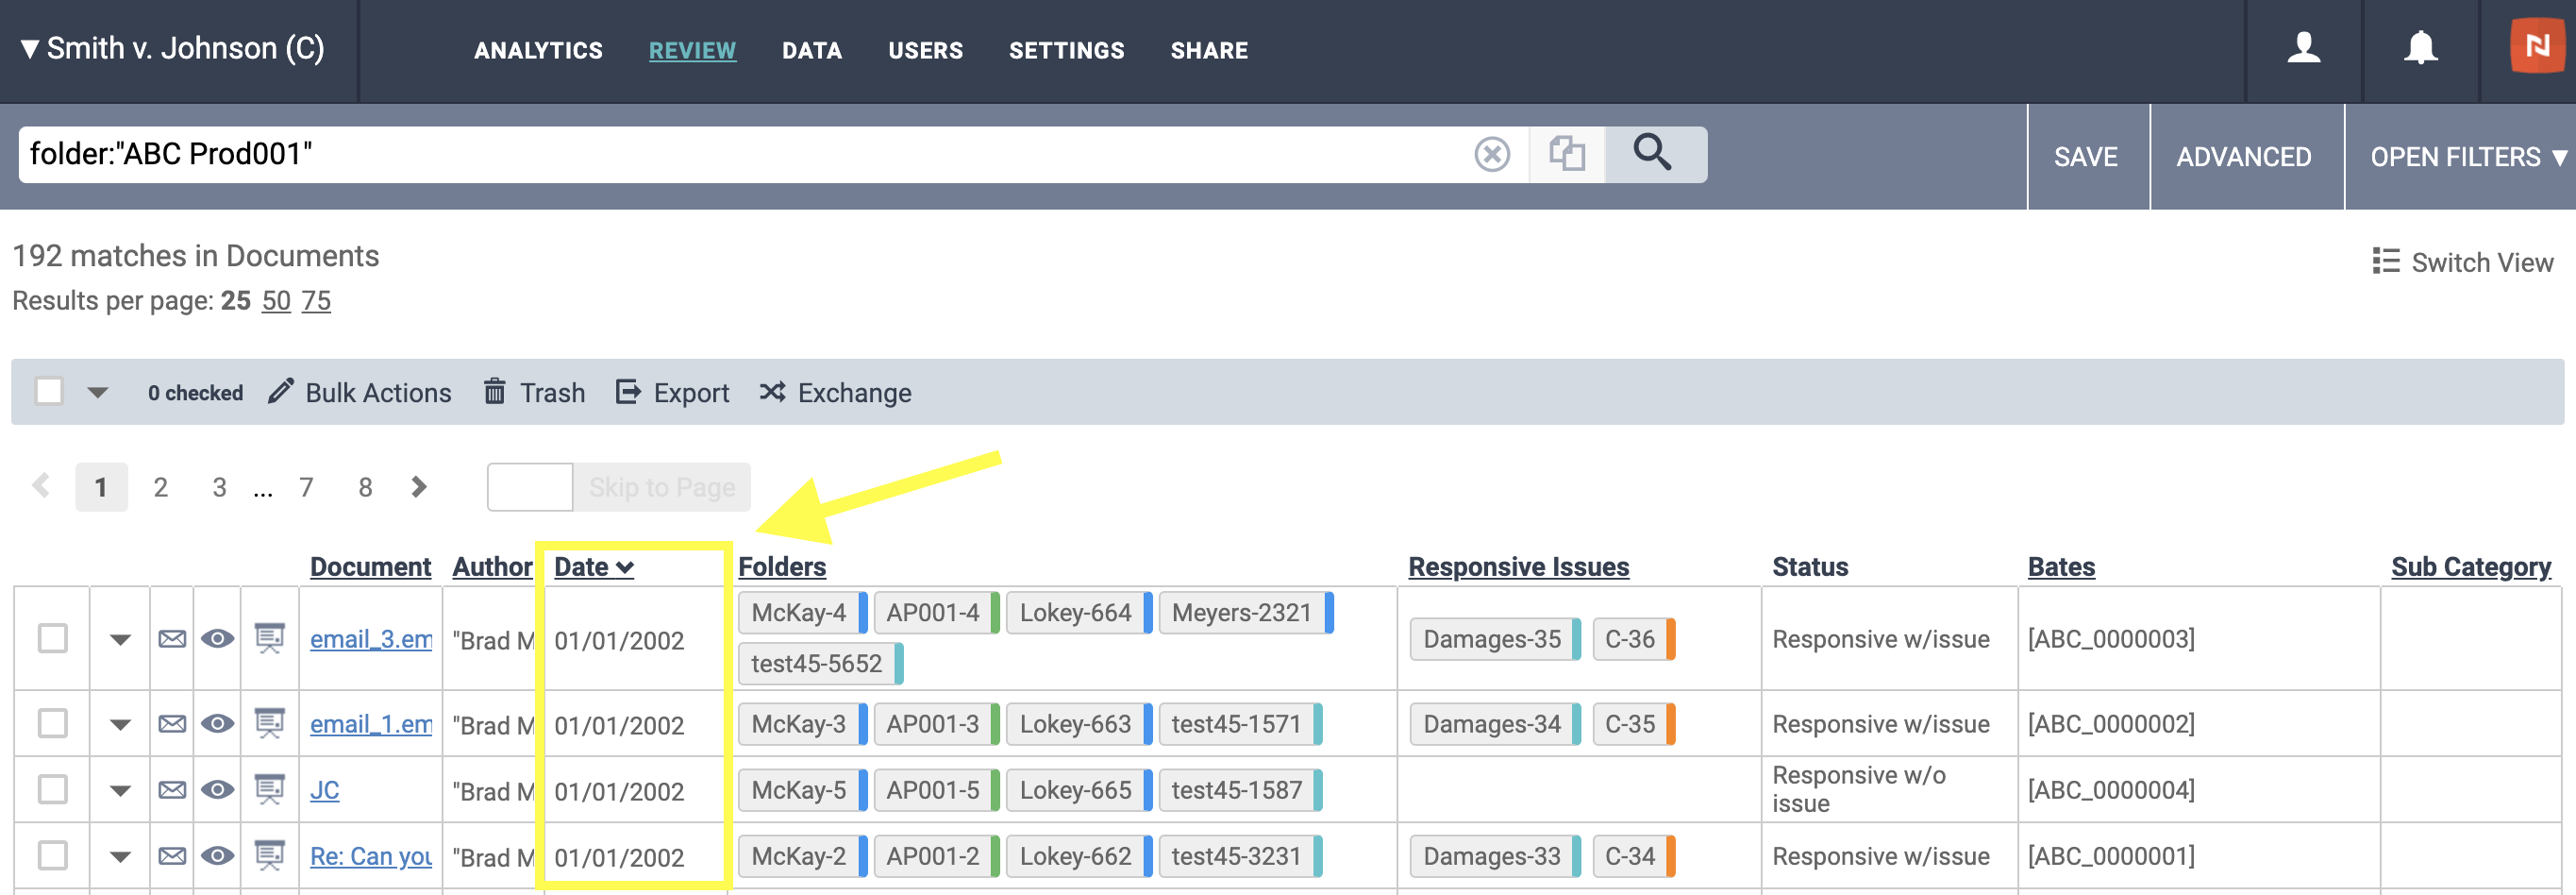
- "Date" in grid view uses the "Document Date" on the document
- For emails, the software will look at the following to populate document date (in order):
-
- The date from the email headers (sent date)
- The date that the email was received
- For attachments to a parent email, those documents will adopt the sent date of the parent email as their document date, ala a "Family Date".
- For other, loose documents or "efiles", the software will look at the following to populated document date (in order):
-
- Modified date
- Created date
- If the aforementioned dates are not present for their file types, the "Document Date" field will be empty at both the document-level and in the grid view.