FAQs
- Near Dupe FAQ
- FAQ - Litigation Chron and Evidence Dashboard
- Export FAQ
- How to do a Hard Refresh
- FAQ: What date is displayed in the date field of the grid view?
- FAQ: How do I resolve endorsement errors?
- FAQ: How does Nextpoint handle tracked changes on Word Documents?
- Speed Testing and Troubleshooting Solutions
- Upload & Import FAQ's
- Litigation FAQ's & Help Topics
- Supported File Types
- FAQ: Can I Import Produced Data into a Discovery Database?
- FAQ: Why is the Title of my Document NOT the File Name?
- Converting a DAT to CSV
- FAQ: How do I recreate my original folder structure in Nextpoint?
- FAQ: How is Document Search Text Obtained?
- Searching - Tips & FAQ's
- FAQ: How do I archive or delete a database once a case is closed?
- FAQ: How do I handle the 63 Responsive Issue limit in Discovery?
- FAQ: Can I create sub-issues to further classify my documents?
- Performing a Fuzzy Search
- Custom Field Input Types
- Accessing Original (Native) Files
- Field Character Limits
Nextpoint’s Near Dupe feature helps identify documents that are highly similar but not exact duplicates, allowing reviewers to quickly recognize overlapping content while preserving meaningful differences. By grouping related documents and assigning similarity scores, Near Dupe analysis helps reduce review volume, improve organization, and streamline document review workflows.
How does our Near Dupe algorithm work?
Nextpoint’s near-duplicate identification tool analyzes document content to identify files that are highly similar but not exact copies. This allows reviewers to quickly recognize overlapping content while still preserving meaningful differences between documents.
- Content Analysis Using Shingling: Each document is broken into overlapping segments of text, creating a structured representation of its content. Documents that share many of these segments are more likely to be considered near-duplicates.
- Similarity Measurement with Jaccard Similarity: These document representations are compared using Jaccard similarity to calculate how much content overlaps between documents. This method identifies high similarity even when documents are not identical.
- Efficient and Accurate Processing: Near-duplicate detection is designed to scale efficiently across large document sets, helping reduce review volume without sacrificing accuracy.
- Configurable Sensitivity: Similarity thresholds may be adjusted to meet the needs of a specific matter, allowing near-duplicate results to be tuned based on review strategy.
Using Nextpoint’s near-duplicate feature helps streamline document review by reducing redundancy, improving organization, and saving both time and cost.
How are scores calculated? What do they mean?
Near-duplicate scores represent the degree of similarity between documents, based on Jaccard similarity calculations. Scores reflect how much content overlaps between documents and are evaluated against a defined threshold to determine whether documents qualify as near-duplicates.
What is considered a Standard Near Duplicate Analysis? What makes it more custom?
A Standard Near Duplicate Analysis evaluates documents across the database to identify groups of files that share a high degree of similarity. Related documents are associated at the document level and assigned similarity scores to help guide review decisions.
Factors that may result in a more customized Near Duplicate Analysis include, but are not limited to:
- Targeted comparisons between specific data sets
- For example, comparing Folder A to Folder B where one data set serves as the primary reference
- Reviewing results in bulk versus document-by-document
- For example, viewing related document groupings within a grid view
- Review strategies focused on reducing review volume
- For example, setting aside documents produced to you when substantially similar versions have already been reviewed from your own data
Near Dupe FAQ
Overview
The Chronology feature helps teams organize and analyze case information by connecting Facts, Issues, and People to supporting documents. This article explains how to create, manage, search, and export Chronology data, outlines permission-based access, and answers common questions about bulk actions, evidence support, and related workflows.
Common Questions
-
Can issues, facts, and people be connected to indicate relationships? (ex: showing that multiple facts support a specific issue)
The ability to directly connect issues, facts, and people to one another within the Chronology is not currently supported. Planned enhancements include the ability to group facts by issue and associate people with related facts directly within the Chronology tab.
-
Can I connect issues, facts, and people to transcript testimony?
Issue, fact, and people coding is currently limited to document evidence. Support for connecting these elements to transcript testimony is under evaluation.
- Issues can already be connected to transcript testimony through Transcript Issues, which are configured via More > Settings > Transcripts. This functionality exists separately from the Chronology feature.
-
Are these features available in the Discovery suite?
Chronology features are not currently available in Discovery. However, users can begin organizing their case early by coding Key Documents and Issues, which are exchanged to Litigation and reflected in the Chronology.
Facts and People can be referenced in Discovery by using custom fields and exchanged to Litigation for further refinement.
Additional notes on transferring from Discovery:
- A “Key Document” single checkbox custom field created in Discovery will exchange to Litigation and map to the built-in Key Document field.
- Responsive Issues coded in Discovery will exchange to Litigation and map to Document Issues in the Chronology and Dashboard.
- Facts and People do not currently exchange automatically. As a workaround, users may create custom picklist fields in Discovery and exchange them to Litigation, then update the values using the built-in fields.
Fact, Issue, and People Management
-
Which user permission levels can access and manage facts, issues, and people?
- Advanced users can create, edit, and delete facts, issues, and people in the Chronology and at the document level.
- Standard users can view the Chronology and apply existing facts, issues, and people to documents.
- Basic users can view the Chronology and see existing coding applied to documents.
- View-only users cannot access the Chronology or apply coding.
-
Where did my issues go in the document coding panel?
Issues are now located in the Case Connections section of the document coding panel. -
Can I exchange Responsive Issues from Discovery to Litigation?
Yes. Responsive Issues in Discovery exchange to Litigation and populate Issues within the Chronology. -
How can I create, edit, or delete facts and people?
-
To create:
- At the document level, navigate to Case Connections, select the appropriate category, and choose Create New.
- In the Chronology tab, switch to the relevant grid and click Create New.
-
To edit:
- At the document level, select the applied item, make changes in the modal, and click Save Changes.
- In the Chronology tab, select the item from the grid and save updates.
-
To delete:
- In the Chronology tab, select the item and choose Delete, then confirm the action.
-
To create:
-
Do I need to manually enter dates when creating facts?
Yes. Dates must currently be entered manually. -
Can facts and people be color-coded?
Yes. Colors can be assigned during creation. If no color is selected, a default gray tone is applied. -
Can facts, issues, and people be restricted from use?
No. However, only Advanced users can create, edit, or delete these items. Advanced and Standard users can apply them to documents.
Bulk Coding & Search
-
Are facts and people available in bulk actions?
Facts and People are not currently available in Bulk Actions to help ensure accurate and intentional coding. -
Can I search for facts, issues, and people?
- Fact:"fact name"
- Issue:"issue name"
- People:"person name" OR Person:"person name"
- People:"person name" AND Issue:"issue name"
-
Are facts and people available in Advanced Search or Filters?
Issues are available in Advanced Search and Filters. Facts and People are not currently included.
Key Documents
-
Will the Key Document field be added to Discovery?
Not automatically. However, Discovery databases using a “Key Document” custom field can exchange data to Litigation and map to the built-in Key Document field. -
What if I had a Key Document field before deployment?
Existing Key Document fields in Litigation are automatically mapped to the new built-in Key Document field. -
How do Hot Document fields exchange from Discovery?
- Rename the Hot Document field to Key Document before exchange.
- Or, after exchange, search for hot_document:* and apply the Key Document field via bulk action.
-
How do I search for Key Documents?
- key_document:true
- -key_document:true
Exports
-
What is included in CSV exports?
All fields displayed in the Facts, Issues, and People grids are included in their respective CSV exports. -
What if I need a visual timeline?
While there is no built-in timeline visualization, Nextpoint Trial Services can assist in transforming fact chronologies into visual timelines. -
Why are document IDs separated by spaces in exports?
IDs are formatted for easy copy-and-paste searching using id:(# # # #).
Evidence Dashboard
-
Who can access the Evidence Dashboard?
Advanced and Standard users can access and use the Evidence Dashboard. -
Can I customize dashboard cards?
Not at this time. -
What is an unsupported fact?
An unsupported fact does not have document evidence associated with it. -
Are Most Viewed Documents user-specific?
No. This data is database-wide.
Infinite Scroll for Transcripts
-
Will infinite scrolling affect existing highlights or designations?
No. All existing designations and issue markups are preserved. -
Can users highlight partial lines?
No.
View related support articles:
Facts, Issues, and People
Litigation Chronology Tab
Evidence Dashboard
FAQ - Litigation Chron and Evidence Dashboard
This FAQ answers common questions about exporting data from Nextpoint, including native files, placeholders, confidentiality stamps, export ordering, PDF behavior, and export template setup.
Export Content & Formatting
This typically occurs when the export template is not configured to include native files or placeholders.
- Update the PDF Export Template :
- Select Use native placeholder in lieu of document images in Step 2
- Select Include under Original Files in Native Format
- Select the Make Smart Exceptions checkbox
Placeholders are controlled through endorsement templates.
- Add file extensions to the endorsement template before stamping.
- In the Numbering Exceptions section, specify file extensions. By default, templates include
.xl*,.ppt*, and.csv*.
- In the Numbering Exceptions section, specify file extensions. By default, templates include
Confidential stamps are applied at the time of endorsement.
- If documents were endorsed before the confidential stamp was added, you will need to remove the endorsement and re-endorse the documents for the stamp to appear.
Export Ordering & Structure
To export documents in chronological order, follow these steps:
- Locate the document set to include in your export.
- Select All documents using the top-left dropdown.
- Click Bulk Actions.
-
Add the documents to a folder for export.
- Recommended: Enable Email Family to include related documents.
- Under Choose order, select Date & Family to maintain chronological order and keep families together.
- Click Update.
- Create an export template that names files by folder order.
- Export the folder using the three-dot menu and select your template.
From the document viewer, open the three-dot menu and select Export This Family.
Enter an export name, configure your options, and click Export.
Export Templates & Load Files
Export templates define how images, text, natives, and load files are handled.
Create templates in Discovery via Settings > Export/Exchange, or in Litigation under More > Settings.
Templates can be reused to ensure consistent export formatting.
Detailed instructions for exporting a load file or index are available here .
PDFs & Search Behavior
PDFs generated by Nextpoint contain document text but are image-based. Searches will locate the correct page, though terms may not be highlighted.
Including text files in your export template provides a searchable alternative where search terms are highlighted.
Exporting as individual PDFs creates one PDF per document, including attachments.
Select documents, choose As Individual PDFs, select an export template, and click Export
Export FAQ
Some updates to the Nextpoint application require you to refresh your browser in order to pick up the latest changes.
Google Chrome
- Windows: Press Ctrl + F5
- Mac: hold Cmd + Shift and then press R
- You can also hold Shift and click Refresh button
Firefox
- Windows: Press Ctrl + F5
- Mac: hold Cmd + Shift and then press R
Safari
- Mac: On the menu go to
Safari >Empty Cache, or press Opt + Cmd + E
Internet Explorer/ Edge (Windows)
- Windows: Press Ctrl + F5
How to do a Hard Refresh
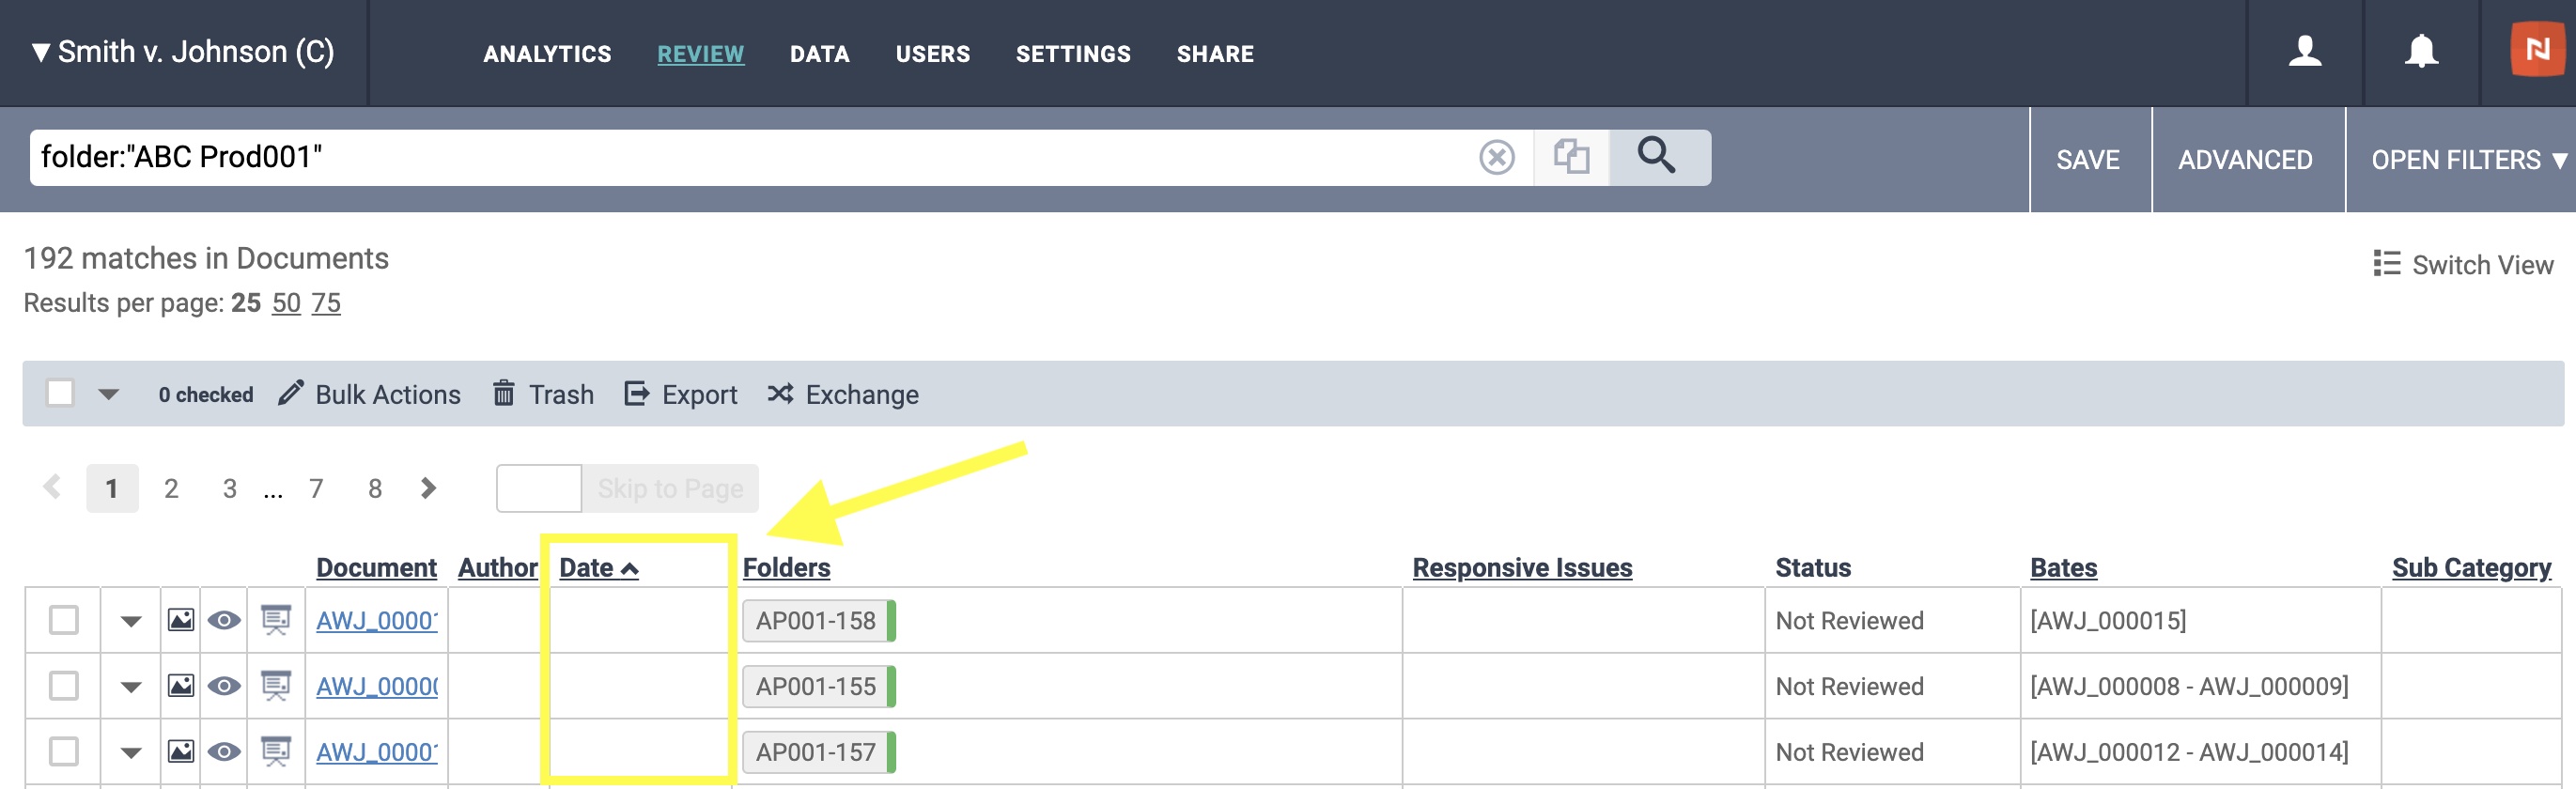
When you are looking at the grid view and you see the "Date" field, where does that value come from?
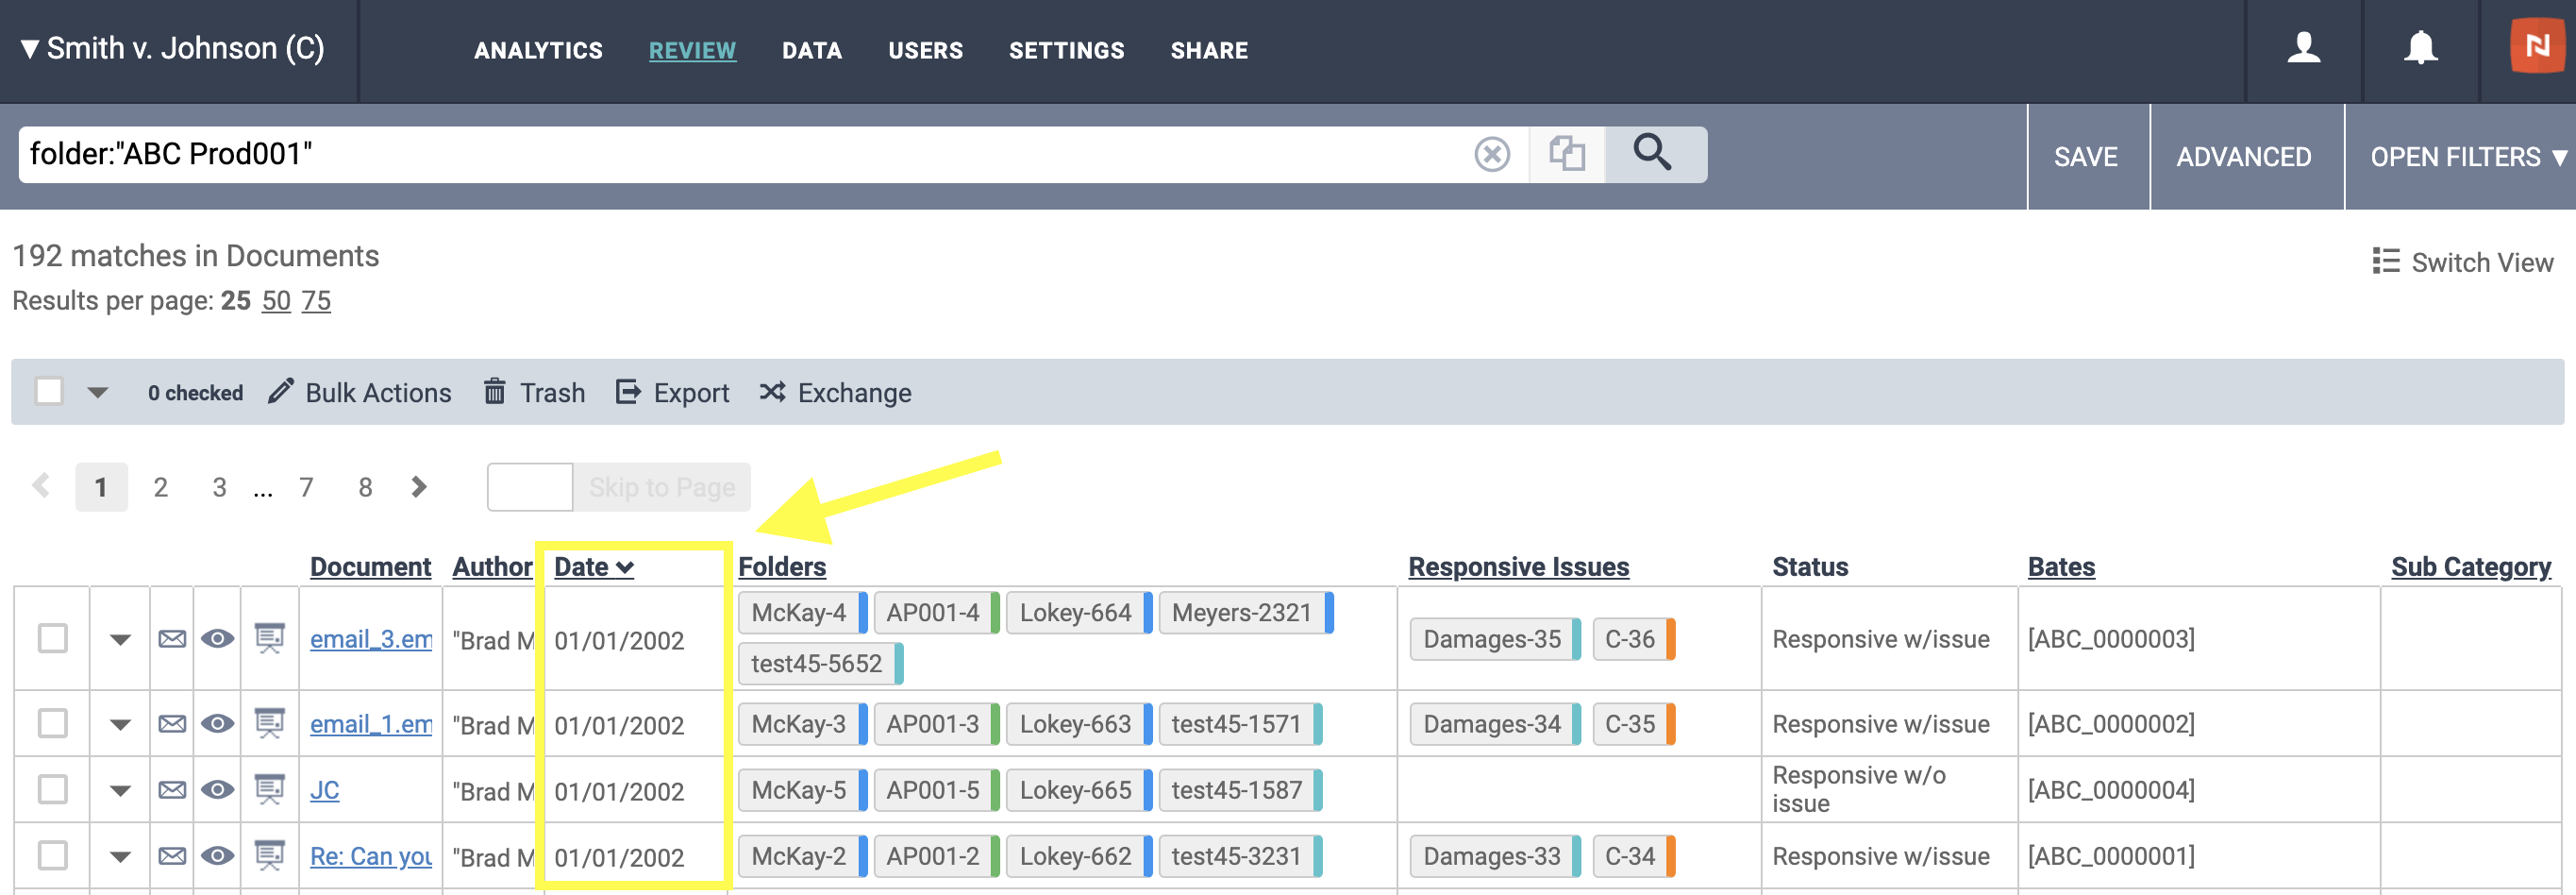
- "Date" in grid view uses the "Document Date" on the document
- For emails, the software will look at the following to populate document date (in order):
-
- The date from the email headers (sent date)
- The date that the email was received
- For attachments to a parent email, those documents will adopt the sent date of the parent email as their document date, ala a "Family Date".
- For other, loose documents or "efiles", the software will look at the following to populated document date (in order):
-
- Modified date
- Created date
- If the aforementioned dates are not present for their file types, the "Document Date" field will be empty at both the document-level and in the grid view.
FAQ: What date is displayed in the date field of the grid view?
FAQ: How do I resolve endorsement errors?
Question:
How does Nextpoint handle tracked changes and comments on Word Documents? Is there a search I can run to locate redlined documents?
Response:
Tracked changes (and comments) on Word documents are only imaged in Nextpoint if they are viewable/on at the time of import. Currently, there is not a searchable field indicative of whether a document has tracked changes.
That said, there are two ways to go about ensuring you are reviewing (and potentially producing) all tracked changes. The first, is a series of steps Nextpoint users can take to review and replace images with tracked changes in their Nextpoint database. The second incorporates the Nextpoint Engagement team for assistance. Both options are outlined below:
Nextpoint User Solution
-
Search for all word documents via the search file_extension:doc*
- You may consider adding your search results to a folder via a Bulk Action for a more streamlined review of the Word Documents.
-
Navigate through the various Word Documents and access the native(s) by clicking Download Original at the top right of each document.
- Once the native is downloaded, review locally in Word application with Track Changes and/or Comments enabled.
- As needed, print each Word Document to PDF.
- If image replacement is needed navigate to the applicable document in Nextpoint click Document Options View Document Pages Delete All Pages.
- Lastly, once the 'old' pages are removed click Document Options Add Pages. Drag and drop the corresponding PDF image from step 6 above and click Import Pages.
Nextpoint Engagement Team Assistance
If internal time and/or resources are not available to you, Nextpoint Engagement team is available to assist via a services request. Our team would manage the aforementioned process of re-imaging all Word Docs with tracked changes/comments and replacing in your database in a more automated fashion.
Please contact your Client Success Director if you would like to discuss further assistance.
FAQ: How does Nextpoint handle tracked changes on Word Documents?
If you experience slow performance while working in Nextpoint, the issue is often related to your internet connection. Use the questions and tips below to help troubleshoot slow navigation or load times.
Note: Some of the steps below may require assistance from your IT department.
Nextpoint performs best with a minimum connection speed of 5 Mbps for both upload and download. If you are experiencing slowness, visit http://www.speedtest.net/ and record your results.
If your speeds are below 5 Mbps, the slowness is likely related to your network connection. Contact your IT department for assistance.
If other websites are slow, the issue is likely related to your internet connection. First, try restarting your browser.
If the issue persists, run a speed test at http://www.speedtest.net/ . If your speeds are below 5 Mbps, contact your IT department.
Having many browser tabs open can increase memory usage and slow performance. Try closing unused tabs and restarting your browser. Restarting your computer may also help free up system resources.
Public networks (such as coffee shops or shared workspaces) may have limited bandwidth. If possible, move to a location with a more stable and reliable internet connection.
If not, restart your computer to refresh system resources and network connections.
If you have access to your router (or your IT department can assist), try restarting it to resolve potential network issues.
Still experiencing slow performance?
Before contacting Nextpoint Support , please be prepared to provide the following information:
- Which Database ID are you working in?
- Are you attempting to access a specific page (for example, Analytics or Document View)?
- Is there a specific action you are trying to perform (for example, searching or endorsing a production)?
- Are you viewing a specific Document ID or deposition transcript?
Speed Testing and Troubleshooting Solutions
Topics Below:
- Is there a restriction on the size of my files?
- Is there a page count limit for uploaded documents?
- Upload times seem to vary, why is that?
- Do I have to load by custodian?
- Import times seem to vary, why is that?
- How do I import LiveNote files?
- How do I import Concordance/Summation files?
- How do I import PDFs and/or TIFFs?
- What are some of the common load file formats Nextpoint supports?
- Why is there additional processing time after my upload completes?
- Why are my email times displayed in UTC (Coordinated Universal Time)?
- Can I navigate away from the upload screen before it completes?
- What is a standard import vs. extended import?
- Are there particular specifications for uploading scanned documents
Is there a restriction on the size of my files?
Although we recommend uploading data sets no larger than 20GB at a time, uploading larger sets is possible via drag and drop. Keeping upload data sets has advantages:
- Smaller files take less time to upload, populating your data quicker while reducing the chance of a network interruption disrupting your upload.
- For privacy and security reasons, some of our validation cannot be conducted until your file has been completely received by our systems. Avoiding extremely large files shortens the time to validation.
If you have data sets to upload that are too large to split into ~20gb sets, we recommend reaching out to our Client Success team for additional options, or using external tools like Cloudberry, Transmit, or the ASW CLI file transfer tool to complete your upload.
See our File Room & Import Best Practices Checklist linked here for further tips and tricks.
Is there a page count limit for uploaded documents?
There is NO limit. Documents for upload can be any number of pages.
Upload times seem to vary, why is that?
The largest obstacle to faster uploads is your network connection. In many cases uploads will be significantly faster at work (business lines are typically larger than at home). You may also notice a small performance boost when connected to the network by wire (vs. wireless). If you experience slow speeds, please review the following linked topic on speed testing and troubleshooting.
* Currently, Nextpoint supports Internet Explorer version 11 or later. We highly recommend switching to the most recent version of Google Chrome, Mozilla Firefox or Microsoft Internet Explorer.
Do I have to load by custodian?
No, you are not required to load by custodian, but it is recommended to utilize the Custodian assignment feature during import. It is important to apply the custodian to an import batch so users can 1) analyze, search and isolate documents for particular custodian(s) and 2) include this information in a production export.
Import times seem to vary, why is that?
There are various factors that impact import processing times in Nextpoint. These include file size, page count, and file complexity. Import time approximations are available in the progress bar in pending imports on the batch status list. The times listed in the progress bars are approximations based on the components of the import data set recognized by the system at that time and are subject to change as the import progresses.
How do I import LiveNote files?
Export your depositions as .lef, .ptf, or .ptx files. One advantage to importing .lef transcript files is that they may also import and link exhibits to the transcript without additional steps required by the user. Follow this link to learn how to batch load depositions.
How do I import Concordance/Summation files?
Follow this link to learn how to import documents with a load file from platforms such as Concordance or Summation.
How do I import PDFs and/or TIFFs?
- Follow this link to learn how to upload tiffs/jpgs with a load file.
- This topic covers the specific considerations for PDF imports when a load file is present.
- Loose PDFs which are not part of a document set produced to you can be imported via our Multiple Files Import Workflow.
What are some of the common load file formats Nextpoint supports?
We currently support imports from Trial Director (.oll) and Concordance (.dat/.csv) load files, as well as the EDRM XML format.
For exports, we support .oll, .dat. .csv, .dii, .lfp, the Opticon .log format, and a Summation .csv/ascii format.
You also have the option of using our services to convert load files from other formats.
Why is there additional processing time after my upload completes?
When your upload has completed, our server has received your entire file. At that point, final validation is performed before your file is cataloged and stored. During your upload, we display an estimate of how much additional time this will take (after the upload status bar is full).
Why do email times appear in UTC in Nextpoint, but show my local time when I open the native email?
When emails are imported into Nextpoint, the “Email Sent” and “Email Received” metadata fields are stored and displayed in UTC (Coordinated Universal Time).
UTC is the global standard for timekeeping. Email systems embed timestamps in UTC so that messages can be interpreted consistently across different time zones. Nextpoint preserves this standard by storing email metadata in UTC within the database.
Why the email image may show a different time zone
You may notice that the time shown on the email image differs from the time shown in the metadata.
This happens because:
- Nextpoint metadata: Email timestamps are converted to UTC for consistent storage and searching.
- Email images: The displayed message follows the email client’s formatting, which may include a local time zone offset (for example, -0500).
Even if the time zones appear different, the actual moment in time is the same. For example:
Email Image: 09:13:59 -0500
Email Metadata: 14:13:59 UTC
These timestamps represent the same point in time, simply expressed in different time zones.
What happens when you download the native email
If you download the original email file and open it in an email application such as Microsoft Outlook or Mozilla Thunderbird, the application will:
- Read the UTC timestamp embedded in the email header.
- Convert it to the local time zone of the user viewing the message.
As a result, the time displayed in the email client may differ from the UTC time shown in Nextpoint metadata, but both refer to the same underlying timestamp.
Can I navigate away from the upload screen before it completes?
When uploading to the File Room, the answer to this is No. Once an upload has started, navigating away from the upload page will cause any progress to be lost. Be patient if you are uploading a lot of files.
Along the same lines, check “Disable Session Expiration” on the login page before larger uploads to avoid Nextpoint signing you out after 30 minutes of inactivity.
If you would like to continue working, open a new browser window or tab. You can continue your work there while your file upload window continues in the background.
Once a import batch has been initiated and is queued for processing you can navigate away and importing will proceed as expected.
See our File Room & Import Best Practices Checklist linked here for further tips and tricks.
What is a standard import vs. an extended import?
Standard imports meet the following criteria:
- Documents as images with corresponding load files. Images must be named as contained in load file. Up to 3 load files per GB of data and a maximum of 25 database fields, OR
- Native files without additional coding. No load file required. Import includes custodian (if listed), folder path from received media, and document metadata.
Extended imports do not meet the above requirements and require an additional Client Success Services estimate before import.
If you have received a produced data set or have data being migrated from a different platform, we recommend reviewing the Data Planning and Advanced Imports webinar and our Ranged Image Import Instructions.
Scanning specifications for uploading documents
To make for an easy batch upload, follow these guidelines when scanning your documents.
Standard Specifications
- Logical document unitization/breaks must be captured and maintained
-
Document relationships must be conveyed, including bound documents
- Relationship information must be populated in loadfile through Begattach/Endattach fields
-
Maintain following “source” information, if applicable:
- Custodian;
- Box Number;
- Folder/Binder Name;
- And any other contextual information the parties involved may find useful
- All photographs, charts, graphs, and any other document where there would be a loss of integrity if the original format was not preserved, must be scanned in color. All other documents can be in black and white.
- Scan in direct size proportions (i.e., size for size)
- Scan as text reads (i.e., vertical v. horizontal)
- All covers, spines, tabs, standard language, duplicate carbons, annotations not directly on the document (i.e., Post-Its), etc. must be scanned on their own page, with a relationship indication to the document(s) it is referencing on the load file provided
- Any media found must be discussed amongst parties involved for proper protocol
- Any additional non-standard scanning metadata must be agreed to amongst parties prior to any scanning
Electronic Format
-
General Considerations:
- All data must be delivered in a structured format
- All scanned collections should be converted to TIFF images, affiliated with a control number, and include fully searchable text files
- File names cannot contain embedded spaces or special characters (including the comma)
-
Images:
- Black and White - 300 DPI; Group IV; Single-Page TIFF Files
- Color - JPEG
- All TIFF images must have a unique file name, correlating to the control number in the load file (I.e. Bates number)
- The number of TIFF files per folder should not exceed 500 files
-
Text:
- A text path field must be included in the load file, providing the path and name of the extracted text file corresponding to each document
- Each text file must be named by the same control number as the image file it corresponds to
- Do not include the actual text in the load file
- The number of text files per folder should not exceed 1,000 files
-
Load File:
- File Format: CSV or DAT accepted
- First line of loadfile must be a header row, identifying each field name provided
- Date fields must be provided in the following format: mm/dd/yyyy
Upload & Import FAQ's
FAQ's
- How do I add a user?
- How do I import data to my case?
- How do I create a folder or issue?
- How do I add coding to documents?
- How do I upload depositions?
- How do I designate testimony in a deposition?
- How do I search for documents using multiple criteria?
- How do I change the order of the docs listed? Can I re-sort them?
- How can I save my search?
- How do I tag the results of a search?
- How do I print documents?
- How do I export a list of all document metadata/coding/identifiers?
- How do I export a list of designations with their objections and notes?
- FAQ's about processing
Help Topics
- Theater; Document Treatments & Presentation
- Preparing Witness Binders
- Organize Your Demonstratives & Work-Product with Share
- Exporting: Deposition Designations, Coding Data
- Stamping Trial Exhibits
- Search, Advanced Search Techniques and Filters
- Working with and Searching Depositions and Transcripts
- Trash Settings
- Video Tutorials: Litigation Organization and Litigation Optimization
Return to Litigation Workflow
Litigation FAQ's & Help Topics
This article outlines the file types supported in Nextpoint, including standard document, image, audio, video, and transcript formats. It also highlights expanded file type support available in NextGen databases.
Table of Contents
All Supported File Types
| Extension | Type | Use Case |
|---|---|---|
| 123 | Lotus 1-2-3 Spreadsheet | Reviewing legacy spreadsheet data. |
| 602 | T602 Text File | Reviewing legacy text documents. |
| avi | Multimedia Container Format | Reviewing video recordings and media evidence. |
| bmp | Windows Bitmap Image | Reviewing scanned images and graphics. |
| cgm | Computer Graphics Metafile | Viewing technical drawings and vector graphics. |
| cms | Connection Manager Service Data File | Reviewing synchronized transcript and video data. |
| csv | Comma Separated Value | Reviewing structured data and spreadsheets. |
| dbf | Database File | Reviewing structured database records. |
| dif | Data Interchange Format | Importing and reviewing spreadsheet data. |
| doc | MS Word Document | Reviewing standard word-processing documents. |
| docx | MS Word Document | Reviewing standard word-processing documents. |
| dot / dotx | MS Word Template | Reviewing document templates and forms. |
| dxf | Drawing Exchange Format | Viewing CAD drawings and technical diagrams. |
| eml / msg / mbox | Email File | Reviewing email communications and metadata. |
| gif / jpg / png / tiff | Image File | Reviewing photographs, screenshots, and graphics. |
| html / xml | Web / Markup File | Reviewing web content and structured data. |
| mp4 / mpg / mpeg / wmv | Video File | Reviewing video evidence and recordings. |
|
Audio & Video File Playback NextGen supports processing and metadata extraction for a range of audio and video file types, but in-app playback is currently limited to .mp4 files only. Files in .mov, .mpg, .mpeg, and .wmv formats will be processed and have metadata extracted, but cannot be played back directly in the application. These files can be downloaded and viewed natively on your device. |
||
| Portable Document Format | Reviewing finalized documents and productions. | |
| ppt / pptx / pps / ppsx | PowerPoint File | Reviewing presentations and slide decks. |
| pst | MS Outlook Email Database | Reviewing collected Outlook mailboxes. |
| rtf / txt | Text File | Reviewing plain-text and rich-text documents. |
| xls / xlsx | Excel Spreadsheet | Reviewing financial, tabular, and analytical data. |
| zip | Compressed Archive | Uploading and reviewing grouped files. |
Expanded File Type Support in NextGen
Databases with the
badge support all file types listed above, plus the additional file types
below.
| Extension | Type | Use Case |
|---|---|---|
| CAD | Computer-Aided Design File | Viewing 2D/3D models and metadata in construction litigation. |
| DWG | AutoCAD Drawing File | Viewing 2D/3D design files and metadata in construction litigation. |
| HEIC | High-Efficiency Image File | Reviewing images collected from iPhones or iCloud backups. |
| GIF | Graphics Interchange Format | Reviewing animated content from messaging and collaboration tools. |
| MHT | MIME HTML Web Archive | Viewing archived versions of webpages. |
| OST | Outlook Offline Storage Table | Processing email when OST is the only recovered format. |
| ICS | Calendar File | Reviewing calendar invites and scheduling details. |
| 7ZIP | Compressed Archive | Uploading and reviewing high-compression or encrypted archives. |
| RAR | Compressed Archive | Uploading and reviewing compressed document collections. |
| TAR | Tape Archive File | Processing Unix/Linux archives and uncompressed containers. |
| PDF Portfolio | Bundled PDF Container | Viewing multiple file types packaged within a single PDF. |
Supported File Types that Cannot be Imaged
The following file types, while supported, cannot be imaged in Nextpoint.
| avi | bak | css | dat |
| db | dbf | dll | dng |
| dwg (supported in NextGen) | dxf | eps | exe |
| pdb | plt | rar | rpt |
| sat | step | stp | swf |
| vcf | wav | webm | wmv |
| x_t | xml | data | password protected (various) |
Supported Transcript File Types
Litigation accepts TXT, PTF, PTX, PDF, LEF, CMS, or ZIP formats for transcript files.
A description of each is outlined below:
| Extension | Description |
|---|---|
| TXT | Raw text-only transcripts considered universal. |
| PTF | Portable Transcript Files created with RealLegal E-Transcript software. |
| PTX | Proprietary E-Transcript files containing full and condensed transcripts. |
| Portable Document Format. Best-effort processing; accuracy should be verified after import. | |
| LEF | LiveNote evidence format with integrated exhibits. |
| CMS | Synchronized TrialDirector transcript format. |
| ZIP | Compressed archive containing multiple transcript files. |
Supported Deposition File Types
| Transcripts | Videos | Sync Files |
|---|---|---|
|
LEF files are the most preferred file type in Nextpoint due to their ability to contain and link exhibits. Ask the court reporter for any/all of the following files:
|
MP4, MPG, and MPEG video files are the most preferred file types. If there is a video tied with a deposition, ask the court reporter for any/all of the following files:
|
CMS sync files are the most preferred file type. If there is a video tied with a deposition, ask the court reporter for any/all of the following files:
|
Additional Supported File Types (Professional Services)
The following file types are supported with assistance from the Nextpoint Professional Services Team. Please contact support@nextpoint.com for more information:
AutoCAD Files:
| dxf | hpg | gl2 |
| dwg | plo | spl |
| dwf | hp | svg |
| dwfx | hpl | cgm |
| plt | hpgl | swf |
| bak | hp1 | emf |
| hg | hp2 | wmf |
| hgl | hpgl2 |
Database Files:
E01 (EnCase image)
DMG (Apple disk image)
*this list is subject to change
Supported File Types
Question
I received a large "data dump" from a producing party and would like to gain some initial insight into the contents of their production and sequester any potentially relevant documents. Can I import this data to a Discovery database so I can use the Analytics and relevancy components?
Response
While users most commonly manage native client data in a Discovery database, we also see users apply the analytics and relevancy review components of a Discovery database to make an initial "relevant vs. not relevant" cull of a large production (100GB+) received from a producing party.
After the aforementioned initial analysis and review, you can then utilize Nextpoint Exchange to copy only documents you deemed relevant from your Discovery database to a new Litigation database.
This workflow has been outlined below:
- Receive large data dump (typically categorized as 100GB, or more).
- Create a Discovery database via your Account Dashboard.
- Import your produced data to your Discovery database.
- Utilize the Analytics tab to gain insight to your data.
- Utilize bulk actions and individual document review coding to mark documents as relevant/not relevant using the responsive and not responsive coding options.
- Add your relevant documents to a folder in preparation for exchanging (copying)to a Litigation database. This is helpful for tracking purposes if you supplement additional documents to your Litigation database at a later date.
- Use Nextpoint Exchange to copy documents from your Discovery database to a new Litigation database where you can further build your case story with your post-production documents and depositions, exhibit stamp, build chronologies, and create electronic document binders to be used in any case proceeding.
Have additional questions as you approach this workflow in Nextpoint? Contact your Account Director and we'll help you get started.
FAQ: Can I Import Produced Data into a Discovery Database?
Nextpoint provides a comprehensive export template library along with an expanded set of metadata fields. These fields allow for more refined searching, exporting, and data analysis, enabling Nextpoint to extract and display more information from your documents.
As a result, certain fields that were previously populated from one document attribute may now be populated differently. One common example is the blue Document Link shown when viewing documents in the Grid View. This link is populated based on metadata priority (see the full field list and priority order here).
A common question we receive is: “Why isn’t the title of my document the same as the file name?” Let’s take a closer look at how and why this happens.
Question
“I renamed multiple documents before importing them into Nextpoint. After import, I noticed that the document link name in the Grid View is displaying a metadata value instead of the file name I assigned prior to import. Why does this happen?”
Response
The blue document link displayed in the Grid View is not the document’s title or file name. Instead, it is populated using a prioritized list of metadata fields.
The priority order is as follows:
- Subject / Title
- Original File Name
- Untitled
If a Subject or Title value exists in the document’s metadata, that value is used for the document link. If no Subject/Title is present, the Original File Name is used instead. If neither value exists, the document link will display “Untitled.”
Question
“How can I change this behavior, or prevent it from happening in the future?”
Response
Solution 1: Adjust Your Grid View
Add the Subject/Title, Original File Name, Shortcut, or any combination of these fields to your Grid View Template. This provides visibility into the various names associated with a document before and after import.
Solution 2: Preserve Bates-Based File Names
If you are importing PDFs that contain Bates numbers in the file name (such as documents produced to you) and those names change during import, you can preserve the Bates-based naming by creating a simple CSV load file.
This approach allows you to retain the Bates start number as the file name while also enabling Bates-based searching within Nextpoint.
To create the load file, follow these steps:
- Create a directory listing of the documents to be imported.
- Paste the directory listing into Column A of Excel so each file appears on its own row.
- Add a header to Cell A1 named image_file.
- Add a header to Cell B1 named bates_start.
- In Cell B2, enter the formula =LEFT(A2,8) and drag it down to populate all rows.
- Note: Adjust the number of characters if your Bates format uses fewer or more than eight characters.
- Save the file as nextpoint_load_file.csv in the same directory as the documents.
Once saved, upload the unzipped files and CSV to your parent folder in the Nextpoint File Room and complete the import.
Solution 3: Contact Support
For additional assistance with creating load files or for an ESI protocol consultation, contact the Nextpoint Product Support team .
FAQ: Why is the Title of my Document NOT the File Name?
DAT files can be manually converted to the CSV format by simply replacing the delimiters. There are various programs you can use for this, but we generally recommend Sublime Text. So, first open your .dat file with Sublime Text.
The values in your original .dat file are separated by the symbols þ□þ (thorn, □ (ASCII 20), and another thorn). So, your coding values look like this:
þBEGPRODþ□þENDPRODþ□þBEGPROD_ATTþ□þENDPROD_ATTþ□þCustodianþ
Using the functions in Sublime Text, you can do a find-replace on these characters. Use the following sequence:
- Find-replace all " (quote) with "" (double quote). This will ensure that your line breaks remain consistent.
- Find-replace all þ (thorn) with " (quote)
- Find-replace all □ (ASCII 20) with , (comma)
This will result in all values being now separated by "," (quote comma quote):
"BEGPROD","ENDPROD","BEGPROD_ATT","ENDPROD_ATT","Custodian" - Save file as: nextpoint_load_file.csv.
- Open the new .csv file in Excel. Your values will be separated into columns (based on the new comma-quote positions).
Now, you can modify the column headers to match the coding that Nextpoint uses.
Please Note: If your .dat file is in UTF-16 format, you must convert it to UTF-8. You can do this is in sublime text by selecting File/Save with Encoding.
Troubleshooting: "My find-replace is not working correctly."
Some clients have had trouble in the past with certain characters being unexplainably replaced during this process, thus altering the desired results of their ending CSV (e.g. "" replacing the character sequence of "th"). If you notice nuances in your resulting CSV, some users have found Sublime Text to be a helpful text editor alternative.
Converting a DAT to CSV
Question
The data which I am importing into my Nextpoint database is in a particular folder structure which I would like to maintain upon import. Can I do this? If so, how do I recreate my folder structure?
Response
The short answer is "yes." Nextpoint maintains your folder structure information upon import, including subdirectories. During import, Nextpoint will maintain the root folder and file path information, and once processing completes, you can search and sort by that specific information in order to recreate your original folder structure.
Set up for Success
The process begins with uploading your parent folder to the File Room, and making sure that it is unzipped before you import. See below screenshot illustrating Parent folder "Client Upload_3" which was uploaded to the File Room unzipped with three subfolders contained within:
Recreate Your Folder Structure
Once your data is in the File Room, take the following steps:
-
Import your parent folder. It is suggested you import one "top" level folder per import batch for purposes of maintaining a clear and concise organization. Navigate back to the level where your parent folder appears, and click the blue import button.
- On the Import Settings Screen, label the batch so that the import will be easy to find later if necessary (we recommend all or part of the file path of the import). Then select the custodian for which this import applies if applicable. Confirm your deduplication and denist settings. And then select or create the folder you want these documents in on import. To create a new folder, select the folder icon to the right of the "Search Folders" field.
- When creating a folder, type in the name you want for the folder, the folder abbreviation/prefix (if you want to change the default), and select the color of the folder.
- Additionally, create a Grid View Template which includes the File Path and Mailbox Path fields. Filtering by File Path and Mailbox Path works the same way. You either add them to the default template, or create a new template that included those fields.
- When creating/editing your template, name it, then drag the fields (including "File Path" and "Mailbox Path") you want to include from the "Available Fields" section on the left into the "Current Fields" section on the right. When you are finished adding your fields, Click the "Save Template" button.
- Once the processing of your import is complete, click on the REVIEW tab, and open the folder you created that contains the recently imported documents.
- Click on the "Views" button to the right of the gridview. This will allow you to select the gridview for your current document set. Select the gridview that you created or edited.
- Click on the filter icon below the header entitled "File Path" (for email folder selection, use the "Mailbox Path" field). For multiple layers of folder nesting, click on the folder icon next to the first level folder you want to look into. This will allow you to see any additional folders that are nested inside that folder. Click on the checkbox next to the name of the folder that contains the documents you want to view.
- Once you have selected the folder you would like to view, click anywhere outside of the filter box. The documents from that folder will be isolated in your gridview.
Note: There is currently a technical limitation that limits the filter display to the top 100 unique folder paths. If this limit will impact your workflow, either reduce the document set you attempt to filter or reach out to support@nextpoint.com for help troubleshooting.
See other FAQ's here or Return to Discovery Workflow.
FAQ: How do I recreate my original folder structure in Nextpoint?
How does Nextpoint obtain a document's search text?
Nextpoint uses the Tesseract OCR engine, which is an OCR engine developed by H-P that was purchased and open-sourced by Google. If you would like further information on the specifics of the Tesseract OCR engine, this Wikipedia article may be beneficial.
During processing, Nextpoint adds text to the database in three ways, and in the following order.
- First, if search text is provided alongside a load file, that text will be prioritized and mapped to each document.
- Next, if no page text is provided, but the document has embedded text that can be extracted, that text is added to the database (e.g. PDFs with embedded text).
- Lastly, if no page text can be extracted directly from the file, Nextpoint will OCR individual pages for their search text.
What does OCR mean?
OCR is short for Optical Character Recognition which is a technology used to recognize text inside of images, such as scanned documents and photos. Once the text is recognized (OCR'd), it is then editable and searchable data.
How does Nextpoint handle foreign language text?
Nextpoint supports language extraction for files with the text present in a load file and/or files with existing extracted text (#'s 1 & 2 above). When we extract, the text is available within the document electronically for us to utilize, and no OCR is required, thus allowing us to utilize text from more languages.
The following languages are supported:
- Chinese - Simplified
- Chinese - Traditional
- German
- English
- Math / equation detection
- French
- Italian
- Korean
- Dutch; Flemish
- Spanish; Castilian
Currently, OCR is supported for English only, but Nextpoint can support additional languages on a custom basis. Please contact your Account Director or support@nextpoint.com for further information.
Need OCR for a foreign language not on the above list, or have further questions related to OCR?
Please feel free to contact our support team at support@nextpoint.com.
FAQ: How is Document Search Text Obtained?
Coding field, enter the name of the field, a colon, and the text.
Examples:
document_date:"January 12, 2007"
author:smith
A phrase, enclose the phrase in quotes.
Examples:
“John Joseph Smith”
author:”John Joseph Smith”
Using + and – operators - You can require a term to be matched, or exclude items for which it matches, respectively.
Examples:
smith +patent -invention
matches "patent" but not "invention", scoring matches of "smith" higher
smith -author:smith
matches "smith" unless the item was authored by "smith"
Specific combinations of terms - You can use the boolean operators AND, OR, and NOT. “and” and “or” will be automatically capitalized for you, but you must enter “NOT” in all-caps to use it as an operator instead of the word “not.” For best results, use parenthesis to group the combinations together.
Examples:
author:(smith OR jones)
smith AND (patent OR invention)
(author:smith AND File_extension:eml) or (author:jones AND document_date:2007-10-12)
(author:smith AND NOT File_extension:xl) or (author:jones AND NOT designated:defense)
Matching Terms or Certain Character Sets - You can input an asterisk(*) after a word to account for variations (e.g. report* will return reporting, reported, reporter, etc..).
There is no limit on characters when a wildcard is placed at the suffix of a word.
A question mark (?) will match any single character (letter/number/etc.), whereas the asterisk (*) will match any sequence of zero or more characters.
Examples:
author:john*
matches john, johnson, johnsen, etc.
jar?d
matches "jared", "jarod", etc.
document_date:2007-06-*
matches any date in June 2007
Embedded Values - If searching in a field which contains an embedded value (e.g. mailbox_path:Emails/Inbox/John Smith Communications/2009) - you can search for the particular value surrounded by asterisks (*) and quotations (").
Examples:
mailbox_path:"*John Smith Communications*"
will return all mailbox paths which include *John Smith Communications*, even if there is a different year following.
Dates - You have multiple options, including searching before/after specific dates. Prefixing a less-than ("<") or greater-than (">") operator to the date will search for dates before or after the specified one, respectively. Adding an equals-sign after the operator will match dates "on or before" or "on or after" the specified one.
Examples:
document_date:<2007-07-13
matches dates before July 13, 2007
document_date:>=2007-07-13
matches dates on or after July 13, 2007
kind:depositiondate:>=2007-07-01 depositiondatedate:<2007-09-01
matches depositions in July and August, 2007
Searchable Coding Fields - To search in a particular coding field, enter the name of the field, a colon, and the text. For your reference, we've compiled a list of all the possible fields built into Nextpoint that you can search here.
For example, in both Discovery and Litigation, to search within a particular folder use the following syntax:
When you create a new custom field, you can use this same syntax to search that field.
Custom Field Range - we currently support numeric custom field range searches bounded in square brackets only
Examples:
There are several ways you can find documents in Discovery using the Search bar:
- Perform a simple search by entering your term(s) in the box, and clicking the eyeglass icon. This window supports full Boolean searching as well.
-
Click Advanced to open the Advanced Search window.
-
Use a Filter Search by selecting the document categories and/or coding you wish to search by, then press Filter Documents. For instance, this filter search would return all Highly Confidential emails that do not contain Production Placeholders.
-
If you have Standard or Advanced status, on the Analytics tab you can perform a quick search by clicking on any graph or total on the page:
Nextpoint employs Boolean logic with Advanced Search. Enter your data in the appropriate fields and press Advanced Search. Here's a breakdown.
-
- Search string builds as you enter terms
- Search by Review Status
- Use Boolean operators and proximity search
- More search tools are available in this dropdown, such as word exclusions and fuzzy searches
- Search within specific coding fields
- Click Advanced Search when all terms are entered, and you will be taken to a results page
When viewing the search bar, there is an icon which looks like two document overlapping. If toggled ON (indicated by blue icon color) and you execute on a search syntax, any results will return grouped with other email family members which also meet your search requirements.
It is important to note, when toggled ON, the only documents which will be returned and subsequently grouped as a family are documents which returned based on your search requirements. Additionally, there is not a particular order which documents will be returned and grouped. Therefore, an attachment may precede the associated email in your grid view.
In the example above:
- An email returned on the search, but the attachments do not, so the email is presented individually
- An email and one of it's attachments returned on the search, but the second attachment did not, so the email and single attachment are presented together.
- An email and it's attachment returned on the search, but the attachment is displayed prior to the email.
Examples of syntax using the "Shortcut" field:
To search for documents that HAVE a value: shortcut:*
To search for documents that DO NOT HAVE a value: -shortcut:*
There are various searches that you can run to return all the documents in your case. Wildcard search by itself yields all documents (*).
Example:
title:* OR title:NULL
title can be replaced with other fields, such as bates or date
To assist in easing your search entry, Nextpoint offers auto-populated values when searching on folders and/or issues.
To make use of this functionality for your folder or issue search, simply start typing folder:", issue:", or category:" and a list of potential values will appear for your selection. See examples below:
Yes, you may group ("nest") criteria in your search using parenthesis.
Examples:
(author:smith AND shorcut:(email OR conversation)) or (author:jones AND document_date:October 10, 2007)
(author:smith AND NOT shortcut:email) or (author:jones AND NOT designated:defense)
A "fuzzy search" can be used to retrieve matches that normally would have been "near misses".
A numeric value on the scale of 0-1 is used to indicate how liberal the included results should be. A value of "1.0" would mean "exact matches only, while a value of "0.0" would match everything (but would lead to significant performance issues). The recommended range for a fuzzy search is from 0.5-0.9. Examples: With a "0.8" numeric value, a search for "plaintiff" would return documents containing "plaintifh" (perhaps a misspelling).
A slash is considered an illegal character and is removed from your search string when it is submitted.
You can normally obtain the desired results by replacing your slash with a wildcard (?) character.To find "/directory/filename.doc" in a custom field called "folder_path"folder_path:"?directory?filename.doc"
Filters produce “AND” search results. For example, filtering would be useful if you were looking for all documents containing the Folder “Defense” and the Issue “Contract Performance.”
If you were looking to run an “OR” search, this can be easily performed using Boolean logic in the search field.
For the previous example, you would type folder:defense OR issue:"contract performance". To use the Filters, click the arrow next to the identifier you wish to search by and press Filter Documents.
Some sample syntax for various stamp searches:
exhibit_stamped_as:*
returns all documents with a stamp
returns all documents with Defense label stamp
returns all documents that have been Bates stamped
returns all documents that have not been Bates stamped
In Litigation, find a particular exhibit number use the following search syntax:
folder:PX:1
where PX is substituted with your Folder Abbreviation, and the number is that of the exhibit you are searching for
To search for documents with a particular Bates prefix use the following syntax in the Search window:
where ABC is substituted with your particular prefix
When searching for documents with a particular Bates number use the following syntax in the Search window:
inclusive of any underscores for spaces, hyphens, and/or leading zeros
For Bates numbers with spaces in them use the following syntax:
There are a few ways you can search within a Bates range:
- Enter the Bates Range in the Coding Fields section in the Filter, and click Filter Documents.
- Go to the Advanced Search, and in the bottom section, More Document Options enter the starting and ending Bates numbers.
-
Use the following syntax in the Search window:
bates:[ABC00001 ABC00099] -
Use the following syntax for a Bates range with spaces:
bates:["ABC ABC_000001" "ABC ABC_000002"]
Note: Only in methods 2 & 3 you can change sort criteria to sort by Bates.
To find docs with a specific tag, you can search - "tag:tagvalue"
To save a search, enter your search criteria, execute your search, then click the Save button.
A popup window will open, where you can name your search, and choose whether you want it to be Public so others can access it. Click Save this search, and it will be available.
This information exists in the background metadata, but is not displayed as part of the standard functionality. A custom script could be developed upon request, please inquire for an estimate of the charges.
Searching - Tips & FAQ's
Question
How do I archive a database once a case is closed?
Single Case Clients: Please complete the Account Cancellation Form to ensure your data is properly handled and billing is terminated.
Response
To archive or delete a Nextpoint database, complete the Data Archive Form .
When completing the form, you may choose one of the following options:
- Nextpoint continues to host the data (a fee may apply), but users no longer have access to the database.
- The database and all associated data are permanently deleted and cannot be recovered.
- Export database(s): All data in the database is exported by Nextpoint’s Engagement Team. Please note that an additional fee applies if Nextpoint performs this service.
For pricing and additional information, contact support@nextpoint.com .
FAQ: How do I archive or delete a database once a case is closed?
Nextpoint allows for the creation of up to 63 Responsive Issues when you are working in any given Discovery database. If you meet the 63-issue limit, you will receive a notification stating you have reached the maximum number of issues allowed in that particular database, and you will not be able to create additional issues.
Note: There is currently no issue limit in LITIGATION
What do you do if you receive the above notification? While the 63-issue limit is inflexible when working in Discovery, outlined below are several workflow solutions which will assist in navigating an alternative approach if needed:
- If two issues are similar, you can merge into one comprehensive issue to free up the secondary issue.
The easiest way to consolidate two issues is to Filter for all documents tagged with Issue A Select All from your Grid View of results Bulk Actions
In Bulk Action pop-up, set Relevancy status Responsive as to "Issue B".
Note: Any bulk actions related to Responsive issues (both adding + removing) are additive and subtractive functionalities, respectively. In other words, if you perform a bulk action update tagging 2 documents with responsive issue B, when they are already tagged with responsive issue A, then the resulting coding for those documents will be responsive issues A AND B.
Then, Filter for all documents with tagged with "Issue B" Select All from your Grid View of results Bulk Actions Remove Responsive Issue A. - Create an additional (custom) Field titled "Additional Responsive Issues", set as a picklist field type, and add your remaining issues as values to this field.
- If some of your issues fit into a particular category/categories, you may want to consider setting up a field for that category in order to free up some space for your other issues.
For example, if you are tagging documents as to multiple states, instead of creating a Responsive Issue per state, you can create a field titled "State", and then list all possible values below.
Note: As in the (red) important note above, if you choose a Picklist field type, be considerate of any potential Bulk Actions you will need/want to make, as Bulk Actions for Picklist type fields will overwrite any existing selections for that field.
Return to Discovery Workflow here.
FAQ: How do I handle the 63 Responsive Issue limit in Discovery?
Question
Can I create sub-issues to further classify my documents?
Response
Yes, absolutely! If you would like to create sub-issues in order to further classify your documents, we recommend taking the following steps:
First, create your top-level issues by going to the Responsive Issues section in your database settings.
- In a Discovery database, this is located via SETTINGS > Coding > Responsive Issues
- In a Litigation database, this is located via MORE > Settings > Documents > Document Issues
Second, for each top-level issue created above, create a (custom) picklist field containing the various sub-issues. Input each top-level issue as the field's title, select picklist input type, and then add your sub-issues as the picklist's values.
- In a Discovery database, this is located via SETTINGS > Coding > Fields
- In a Litigation database, this is located via MORE > Settings > Documents > Fields
Lastly, once your sub-issue fields have been created, we suggest you promote these fields as Hot Fields so they are readily accessible at the top of your coding panel.
- In a Discovery database, this is located via SETTINGS > Coding > Hot Fields
- In a Litigation database, this is located via MORE > Settings > Documents > Hot Fields
Example of Sub-Issues
In the graphical representation below, we have set up an option for employing sub-issues in your Nextpoint database:
First we created the top-level Responsive Issues, bad faith claim, conspiracy claim, and fraud claim. This was accomplished by navigating to SETTINGS Coding Responsive Issues Create New.
Below is where these three top-level Responsive issues will appear in the document coding panel.
Then, we created a (custom) Field with a picklist input type for each top-level issue. This was accomplished by navigating to SETTINGS Coding Fields Create New.
We titled each new field name by the top-level issue's name (e.g. Bad Faith Claim), selected the picklist input type, and then set up values for each sub-issue.
Once the sub-issue fields were all created, the last step was to promote those fields to the top of our coding panel by adding them as Hot Fields. Below is the end result after we created the sub-issues and promoted each as Hot Fields.
Need assistance setting up and organizing your Issues and Sub-Issues? Contact your Account Director and we will connect you with our Nextpoint Services Team.
FAQ: Can I create sub-issues to further classify my documents?
A fuzzy search allows you to retrieve results that would otherwise be missed due to minor variations such as misspellings or typographical errors.
Fuzzy search uses a numeric value on a scale from 0.0 to 1.0 to control how closely results must match the search term:
- 1.0 – Returns exact matches only.
- 0.0 – Matches nearly everything (not recommended, as it can significantly impact performance).
The recommended range for fuzzy searches is 0.5–0.9, which balances flexibility with performance.
Example: With a fuzzy value of 0.8, a search for plaintiff would return documents containing variations such as plaintifh.
When should I use fuzzy search?
Fuzzy search is most useful when you expect spelling errors, OCR inaccuracies, or inconsistent terminology—such as in scanned documents or informal communications.
Avoid using very low fuzzy values (below 0.5) on large data sets, as they can return overly broad results and negatively affect search performance.
Advanced Search Builder
Resulting Search Syntax
Set up a fuzzy search using the Advanced Search feature.
Performing a Fuzzy Search
When creating a Custom Field for your database, you can choose from several different input types.
Below is a brief description of each available field type, along with an example of how that field appears during coding.
Date
Select a date using a drop-down calendar. Dates are applied during coding, so no predefined values are required when creating the field. This field type is useful for sorting, as dates entered into freeform fields are sorted alphanumerically.
Freeform
Enter any text into a blank field. Because this is a freeform field, no predefined values are required.
List
Select from a predefined list of values, with an Add New option available if the desired value does not yet exist in the list.
Locked List
Select from a fixed list of predefined values without an Add New option. This field type is useful when you want to prevent users from editing or adding additional values.
Paragraph
A freeform field that expands to display longer text entries, such as Attorney Notes or a Document Summary. No predefined values are required.
Picklist
A list of values that allows users to select more than one applicable option.
Type or select a value, then click Add. Click the x to remove a selected value. To add new values to the list, go to your Settings and add them to your hot fields.
Single Checkbox
Set a single value, such as identifying a document as a Hot Doc.
Custom Field Input Types
When viewing a document, the original file(s) used to create the document can be accessed in the top bar of the document viewer. Clicking on the original file will allow you to download it, and view it locally on your computer.
You can also choose the Three-dot menu > View original files to view the files in a pop-up window, and download them from there.
Accessing Original (Native) Files
Field Character Limits are outlined below:
Shortcut - 500
Author - 255
Document Type - 255
Subject / Title - 1100
Custodian -255
Tags - 2000
[Custom] Paragraph fields - 2000
[Custom] Freeform fields - 2000
Designation Names - 100
Issue Names - 100
Folder Names - 100
Objection Names - 100
Need the character count expanded for any of the aforementioned fields? Contact your Account Director for further information.