
Use image markups to highlight and redact imaged documents. This article covers:
- Make highlights and redactions
- Zoom on image markups
- Review highlights and redactions on a document
- Filter for highlights and redactions
- Export highlights and redactions
- Important note on exporting redactions and highlights
Make Highlights and Redactions
To add highlights or redactions to an imaged document, open the document and click the Image Markup icon at the top right of the Document Viewer.
At the top of the next screen, you can switch the Image Markup tool between two modes: Highlight and Redact.
Highlight
Go to the page you want to highlight and set the toggle on the right side of the screen to Highlight. You can optionally select an associated issue and add a note.
- Click where you want the highlight to begin, then drag to complete it.
- To add another highlight on the same page, repeat the click and drag.
- To resize a highlight, click its edge and drag.
Click the orange Highlight button before moving to the next page. You will be prompted if you forget.
Highlights do not burn onto productions
Highlights are internal work product. They are visible to your team in the Document Viewer, but they do not appear on exported or produced images unless you explicitly choose to include highlights when you export. Only redactions are always burned onto exported images.
Redact
Set the toggle to Redact, then select a redaction reason and style. You can optionally add a note.
- Click where you want the redaction to begin, then drag to complete it.
- To add another redaction on the same page, repeat the click and drag.
- To resize a redaction, click its edge and drag.
Redactions are always burned onto exported images. See Important note on exporting redactions and highlights before exporting redacted documents.
Zoom on Image Markups
Click the Toggle Zoom button at the top right of the document, then hover over the document for a closer view. When you click to start a highlight or redaction, the zoom adjusts slightly to keep the text you are marking in focus.
Review Highlights and Redactions on a Document
All highlights and redactions on a document are listed by page in the Annotations section of the sidebar.
To view the document without image markups, click the Toggle Markups icon at the top right of the Document Viewer.
Filter for Highlights and Redactions
Use the Filter menu to limit results to documents with highlights:
Or to documents with redactions:
Export Highlights and Redactions
You can export image markups in both Discovery and Litigation using any of the three options below. Highlights are included in an export only when you select them. Redactions are always applied to exported images.
Option 1: Assemble as PDF
In Discovery: Go to the REVIEW tab and click the  menu. Click Assemble as PDF and choose whether to include highlights, redaction notes, or page notes. Nextpoint will notify you when the PDF is ready to download.
In Litigation: Go to the DOCUMENTS tab and click the menu. Click Assemble as PDF and choose whether to include highlights, redaction notes, or page notes. Nextpoint will notify you when the PDF is ready to download.
Option 2: Export a single document from Document Options
In Discovery or Litigation, open an individual document and click the Document Options dropdown.
Export Family exports the document's family to a PDF, with the option to include image markups and page notes. Make your selections and click Export. The PDF will begin downloading.
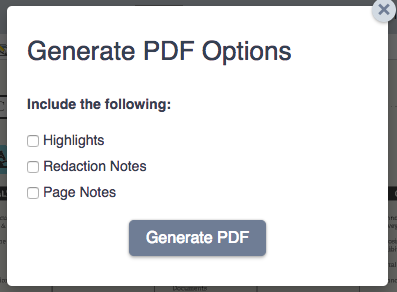
Generate PDF exports the individual document to a PDF. Select any image markups or page notes to include and click Generate PDF. The PDF will begin downloading.
Option 3: Export highlights using a load file
Load file templates define which fields are exported and how they are arranged. They are created as part of the export template process, and one load file template can be used by multiple export templates.
-
In Step 4 of the export template process, click Create New. Name the load file template and select the fields to include in the export.


-
Once the load file and export template are complete, select a folder and choose Export from the dropdown menu.
-
Name the export, choose your export template, and continue.
Nextpoint will generate ZIP archives and notify you when they are ready to download.
Important Note on Exporting Redactions and Highlights
Redactions: Once a redaction markup has been applied, the redaction will be in place on the image anytime that document is exported, and the underlying redacted search text will be removed from any provided text files. If you are including a metadata load file with your export, review the export closely for redacted fields such as author, recipient, or email subject. If those fields were redacted on the images or text, you will need to remove them manually from the metadata load file.
Highlights: Highlight markups will NOT be exported on your images unless you explicitly select them during the export process, as outlined above. Highlights do not remove or change any search text or metadata, so the metadata load file review described above applies only to redactions.
Comments
Please sign in to leave a comment.