Document Fields & Coding
- Near Dupe Detection
- Metadata Availability by Document Type
- Setting Up Custom Grid Views in Discovery
- Adding Key Terms to Documents
- Creating & Editing Responsive Issues in Discovery
- Creating a Privilege Code in Discovery
- Creating a Confidentiality Code
- Creating Custom Fields in Discovery
- Custom Coding
- Creating Redaction Reasons
- Creating Hot Fields in Discovery
- How To Trash And Restore Documents
Overview
Nextpoint reduces review time by detecting duplicate documents and removing them from the review set. Previously, this only applied to exact copies in the same file format.
Near duplicate detection extends this functionality by identifying documents with similar content, even when formats differ (for example, an email printed to PDF). The feature compares OCRed text across documents and assigns a similarity score.
When reviewing a document, you can view related documents above a defined similarity threshold, making it easier to folder or code similar materials. Additional options—such as folder-specific comparisons or master set creation— are available on a custom basis.
How to Access Near Duplicate Detection
While reviewing a document, click the Contact Us button to request near duplicate detection. Near duplicate detection is an add-on feature available for an additional cost and must be enabled per database.
After submitting the request, a Nextpoint team member will follow up to understand your needs, and our developers will enable near duplicate detection.
Viewing Near Duplicates
Once the feature is enabled, follow these steps to view near duplicates:
- Open the Related Documents tab.
- Click the Duplicates tab.
- Exact duplicates appear first, followed by near duplicates. In the Near Duplicates section, each document displays a similarity score to the right of the document pill.
- Bulk code near duplicates just as you would other related documents in this tab.
- Modify the Duplicates tab view using filters to show or hide exact duplicates and adjust the similarity score threshold for near duplicates.
If a document has many near duplicates, they are grouped by similarity score and can be added to a grid view. Links are available for similarity thresholds of 80, 85, 90, and 95. Clicking one of these links runs a search that includes the source document’s NPID and the selected similarity score floor:
near_duplicates:(89552 and similarity_score:>=95)
From the grid view, you can perform bulk actions on similar documents. You may also manually adjust the similarity score threshold directly in the search bar.
For additional information about near duplicate detection or to schedule a demo, contact support@nextpoint.com or click the Enable Near Dupe Detection button within your database.
Near Dupe Detection
Below is a comprehensive list of all the metadata fields Nextpoint extracts per file type.
The second matrix shows which metadata fields Nextpoint extracts and maps from native files during processing, with checkmarks indicating which fields are available for each document type (Email, E-file, Attachment, etc.).
Quick Note: This only covers Nextpoint's native extraction capabilities. Metadata can only be extracted from present data and will only populate for available fields. Additional data can always be applied via a load file or overlay to populate other fields as needed.
Fields and Descriptions
| User-facing field name | Description |
| Author | Combined author field with priority order: Emails: Email Author E-files and attachments: Document Last Author, then Document Author |
| Subject/Title | Combined field displaying email subject for emails and title field for e-files and attachments. |
| Document Date | Combined date field with priority order: Emails: Sent date, then received date E-files and attachments: Modified date, then created date |
| Document Author | Author field extracted from native file metadata. |
| Document Last Author | Last "Saved By" field extracted from native file metadata. |
| Document Subject | Subject field value extracted from metadata of native file |
| Document Title | Title field extracted from native file metadata. |
| Page Count | Number of processed images for the document. |
| Document Type | Category of document based on origin: Email (natively processed email files), Attachment (files extracted from emails), or Efile (standalone documents not imported as ranged images with load file). Values can be overwritten by load file data. |
| File Name | Original filename of the native file. For email records, contains the email subject. |
| File Path | Full path of the original file. For loose file/native imports, shows original file location. For load file imports, read from mapped file_path field. |
| MD5 Hash | MD5 hash value of the native document for file integrity verification. |
| Shortcut | Multipurpose field capturing pathing, folder structure, or naming information about imported documents. |
| App Name | Application name extracted from native file metadata. |
| Last Print Date | Date the native file was last printed (Microsoft Office documents only). |
| Created Date Time | Creation date and time of the native file when imported without produced images. |
| Encrypted | Indicates whether the native document was encrypted at import (Yes/No). |
| Modified Date Time | Date and time the native file was last modified. |
| Email Date | Combined datetime field prioritizing email sent date, then email received date. |
| Email Delivery Date | Date when email was delivered in MM/DD/YYYY format. |
| Email Date Time | Time when email was received in HH:MM:SS format using local timezone when available. |
| Email Date Sent | Date when email was sent in MM/DD/YYYY format. |
| Email Time Sent | Time when email was sent in HH:MM:SS format using local timezone when available. |
| Email Date Received | Date when email was received in MM/DD/YYYY format. |
| Email Time Received | Time when email was received in HH:MM:SS format using local timezone when available. Defaults to Universal Time (UTC) when local timezone is not provided. |
| Recipients | All email recipients separated by semicolons. Exact format depends on email client address book and may include names, email addresses, and/or display names. |
| Email Message Id | Unique message identifier extracted from email metadata. |
| Email Author | Sender of the email message. |
| Email Received | Last server datetime when email was received. |
| Email Sent | Date and time when email was sent. |
| BCC | Blind carbon copy recipients for email. Multiple recipients separated by semicolons. |
| CC | Carbon copy recipients for email. Multiple recipients separated by semicolons. |
| Email Subject | Subject line of the email message. |
| File Extension | File extension of the processed document, derived from the original filename. |
| File Size | File size of the processed document in bytes. |
| Root Folder | For Loose File imports only. When importing files from the File Room, this captures the parent folder name of each imported file. Rather than storing the full file path, this field contains only the root folder name, relative to the folder selected during the import process. |
| Mailbox File | Filename of the mailbox archive from which the email was extracted (if applicable). |
| Mailbox Path | Full sequence of mailboxes and sub-mailboxes specifying the email's location within the mailbox structure. |
| Master Date Time | For all emails, the master date time is the email_sent date. If email_sent is not available, then use email_received. For all attachments of emails, the master date time is the master date time of their parent email. For all other documents, the master date time is the modified_date_time. If modified_date_time is not available, use created_date_time. |
Native Extraction by File Type
| User-Facing Field Name | Email (msg, eml) | Efile (General) | Attachment | Mailbox Container (pst, mbox) | Images | Multimedia |
| Author | ☑️ | ☑️ | ☑️ | -- | -- | -- |
| Subject/Title | ☑️ | ☑️ | ☑️ | -- | -- | -- |
| Document Date | ☑️ | ☑️ | ☑️ | -- | -- | -- |
| Document Author | -- | ☑️ | ☑️ | -- | -- | -- |
| Document Last Author | -- | ☑️ | ☑️ | -- | -- | -- |
| Document Subject | -- | ☑️ | ☑️ | -- | -- | -- |
| Document Title | -- | ☑️ | ☑️ | -- | -- | -- |
| Page Count | ☑️ | ☑️ | ☑️ | ☑️ | ☑️ | -- |
| Document Type | ☑️ | ☑️ | ☑️ | ☑️ | ☑️ | ☑️ |
| File Name | ☑️ | ☑️ | ☑️ | -- | ☑️ | ☑️ |
| File Path | -- | ☑️ | -- | -- | ☑️ | ☑️ |
| MD5 Hash | ☑️ | ☑️ | ☑️ | ☑️ | ☑️ | ☑️ |
| Shortcut | -- | ☑️ | ☑️ | -- | ☑️ | ☑️ |
| App Name | -- | ☑️ | ☑️ | -- | ☑️ | ☑️ |
| Last Print Date | -- | ☑️ | ☑️ | -- | -- | -- |
| Created Date Time | -- | ☑️ | ☑️ | -- | -- | -- |
| Encrypted | -- | ☑️ | ☑️ | -- | -- | -- |
| Modified Date Time | -- | ☑️ | ☑️ | -- | -- | -- |
| Email Date | ☑️ | -- | -- | -- | -- | -- |
| Email Delivery Date | ☑️ | -- | -- | -- | -- | -- |
| Email Date Time | ☑️ | -- | -- | -- | -- | -- |
| Email Date Sent | ☑️ | -- | -- | -- | -- | -- |
| Email Time Sent | ☑️ | -- | -- | -- | -- | -- |
| Email Date Received | ☑️ | -- | -- | -- | -- | -- |
| Email Time Received | ☑️ | -- | -- | -- | -- | -- |
| Recipients | ☑️ | -- | -- | -- | -- | -- |
| Email Message Id | ☑️ | -- | -- | -- | -- | -- |
| Email Author | ☑️ | -- | -- | -- | -- | -- |
| Email Received | ☑️ | -- | -- | -- | -- | -- |
| Email Sent | ☑️ | -- | -- | -- | -- | -- |
| BCC | ☑️ | -- | -- | -- | -- | -- |
| CC | ☑️ | -- | -- | -- | -- | -- |
| Email Subject | ☑️ | -- | -- | -- | -- | -- |
| File Extension | ☑️ | ☑️ | ☑️ | ☑️ | ☑️ | ☑️ |
| File Size | ☑️ | ☑️ | ☑️ | -- | ☑️ | ☑️ |
| Root Folder | -- | ☑️ | -- | -- | ☑️ | ☑️ |
| Mailbox File | ☑️ | -- | ☑️ | -- | -- | -- |
| Mailbox Path | ☑️ | -- | ☑️ | -- | -- | -- |
| Master Date Time | ☑️ | ☑️ | ☑️ | -- | -- | -- |
Metadata Availability by Document Type
*This functionality is available for Advanced users only.
When reviewing a particular type of document or document set in Discovery (e.g. emails, search results, etc..), it can be helpful to create a Grid View for an "at a glance" snapshot of your results.
Creating a Grid View Template
- To create a custom Grid View, click SETTINGS at the top of the screen > choose the General tab > click Create New to make a new template.
Note: In the Grid View Column Templates section at the bottom, you can view the currently saved templates, as well as Edit or Delete. - Provide a Name for your template and click Save Template
- In the next screen, you can select fields which you would like to include in your Grid View Template. You can do this by dragging and dropping from the Available Fields (left) to the Current Fields (right).
Likewise, you can remove fields from your template by dragging and dropping from Current Fields to Available Fields.
- Once the fields you would like to include are in the Current Fields column on the right, you can click and drag field name(s) up and down to reorder.
- Select the default Sort Order if you would like to consistently sort results in this grid view by a particular attribute.
- When you are finished, click Save Template, and your template will be available in Grid View.
Using Your Grid View Templates
All Grid View Templates are available for selection after running a search OR filter under the REVIEW tab via the Views slider at the top right of the grid view.
To toggle your view, simply click the Views slider and select your view from the drop-down.
For more information on using Grid View and Chron View, click here >>
Return to Discovery Workflow
Setting Up Custom Grid Views in Discovery
To create key terms within your Discovery database, click SETTINGS > General and navigate to the Key Terms settings box and click "Edit".
In Litigation, Key Term settings are located in MORE > SETTINGS > Documents.
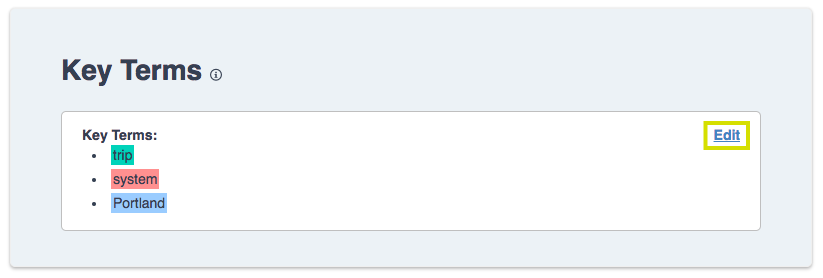
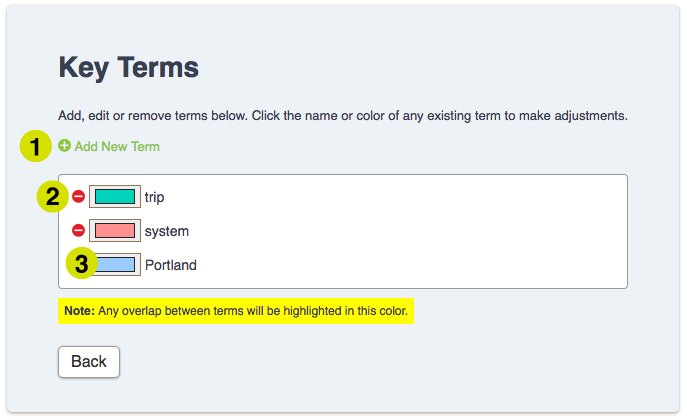
Adding, editing, or deleting key terms:
- To add: Click "Add New Term".
- To delete: Click the red cancel icon.
- To edit: Click the color box or the term itself.
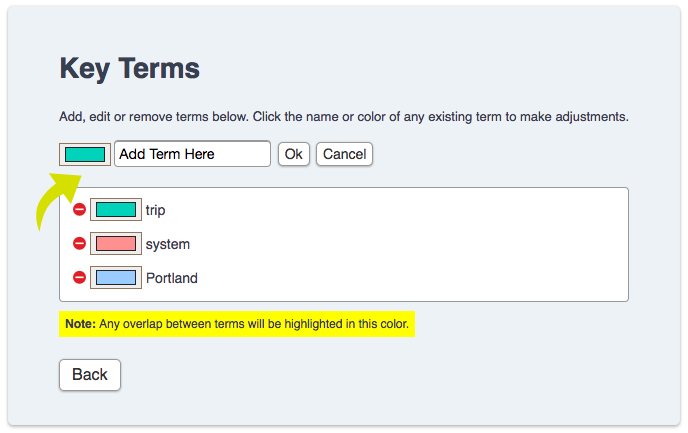
Adding key term highlights, continued:
After clicking the "Add New Term" button, type the term or phrase in the text box then click the color box to change the color. See image below.
Choosing the color of your key term highlight:
After clicking on the color box, choose the color by clicking on the left side boxes or right side color bar and the shade in the center box. Once the preferred color is picked click "Choose".
To view the key terms in your document:
Click the Key Term Mode button located at the top left of your document. In the search box, type in a key word and it will be highligted in the assigned color.
Return to Discovery Workflow
Adding Key Terms to Documents
*This functionality is available for Advanced users only.
Responsive Issues are a database asset which can be utilized to organize and categorize your documents during your review.
Creating a Responsive Issue
To create a Responsive Issue, at the top of the home page navigate to SETTINGS > Coding. Scroll down to the Responsive Issues section, then click Create New.
Choose a Name and Abbreviation for your Issue, assign both an Editor and Report color, and click Create.
Responsive Issue FAQ:
"What is the difference between Editor and Report Color?"
The Editor Color is what you will see throughout your Nextpoint Database (Gridview, Filter, Document View, etc..) while the Report Color will show as your highlight color when applying image markups to your documents and associating with the particular issue.
"How many Responsive Issues can I create?"
Nextpoint allows for up to 63 Responsive Issues when working in Discovery. For further information on how to handle situations when you may have more than 63 Issues, please click here.
"Can I create sub-issues to further classify my documents?"
If you would like to create sub-issues, we recommend creating your top-level issues under the Responsive Issues settings section as described above. Then, for each top-level issue, you can create a (custom) picklist Field containing the various sub-issues. Click here for further information>>
Editing a Responsive Issue
You can change the name, color, etc. of an issue by clicking Edit next to the particular Issue under SETTINGS > Coding.
Deleting a Responsive Issue
Currently, you are unable to delete Responsive Issues, but Nextpoint allows for Issues to be deactivated when not in use or out of date.
The option to deactivate an issue can be helpful when you are no longer using a particular issue and/or want to clean up your coding panel, but also want to maintain the option of "reactivating" down the road.
To deactivate an issue, navigate to SETTINGS > Coding > click Edit to the right of the Responsive Issue at hand, and click deactivate in the upper right-hand corner of the editing pane.
Return to Discovery Workflow
Creating & Editing Responsive Issues in Discovery
*This functionality is available for Advanced users only.
Custom Privilege Codes can be created, allowing you to code documents as Privileged, and designate the reason(s) a document is considered privileged.
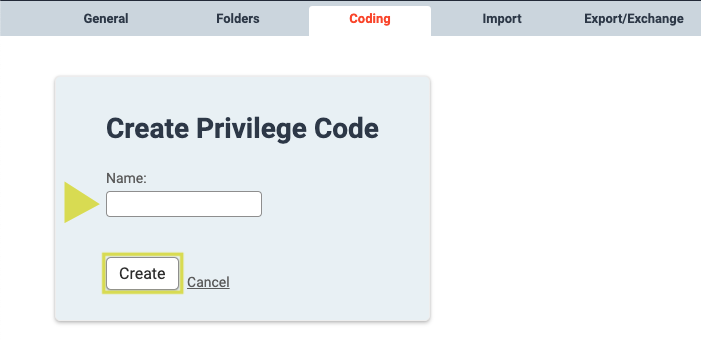
At the top of the home page go to SETTINGS > Coding. Scroll down to the Privilege Codes section, then click "Create New".
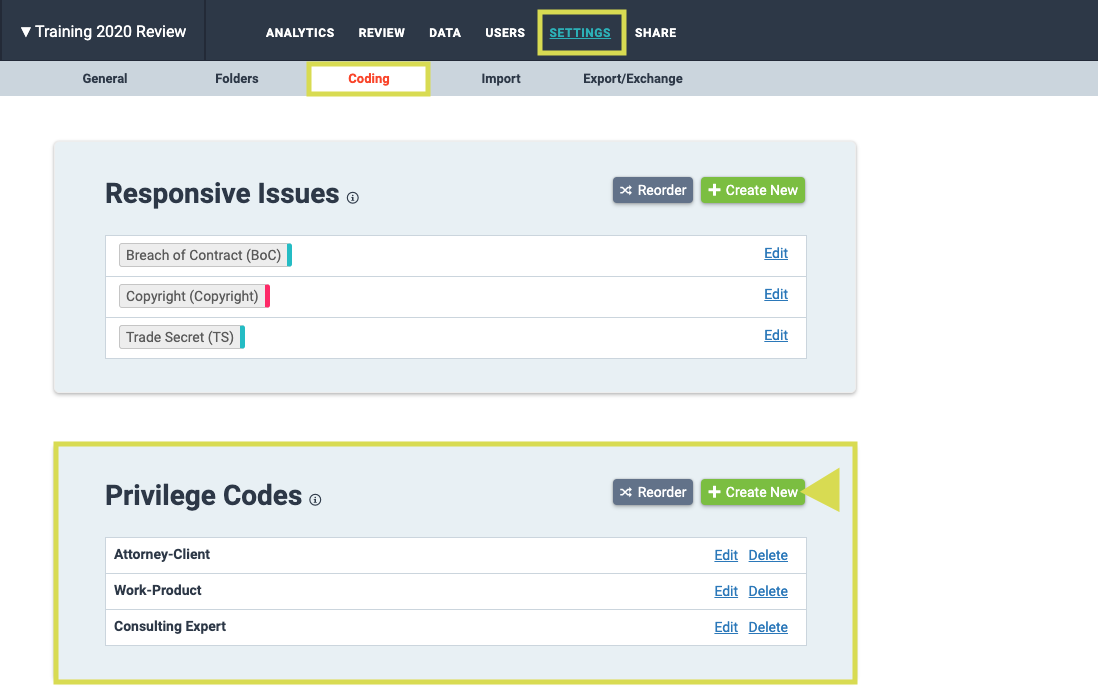
Enter the new Privilege Code name, and click "Create".
Return to Discovery Workflow
Creating a Privilege Code in Discovery
*This functionality is available for Advanced users only.
Custom Confidentiality Codes can be created, allowing you to code documents as confidential, and instantly endorse them with the appropriate confidentiality stamp.
To locate the Confidentiality Code settings, in the top navigation of your database, click SETTINGS > Coding.
Scroll down to the Confidentiality Codes section, then click Create New.
Enter the new Confidentiality Code name, and click Create.
Using a NextGen database?
If you see in the top left next to the name of your database, you can choose where the confidentiality stamp appears (left, center, or right).
Once created, the Confidentiality Coding option will be available for use in the Document Viewer.
Creating a Confidentiality Code
Create Custom Fields by navigating to SETTINGS > Coding.
Scroll to the Fields section and click Create New.
Enter a name for your custom field, select the appropriate input type, and click Create.
You can create as many custom fields as needed for your database.
Promoting a Custom Field to a Hot Field
If you have coding fields that you use frequently, you can promote them as Hot Fields to make them more easily accessible during review. Hot Fields appear in the Coding Fields panel in both Discovery and Litigation.
In Discovery, go to SETTINGS > Coding and scroll to the Hot Fields section.
In a Litigation database, Hot Fields are located under More > SETTINGS > Documents.
Click Add New to designate one or more Custom Fields as Hot Fields. You can also use Reorder to control the order in which Hot Fields appear in the coding panel.
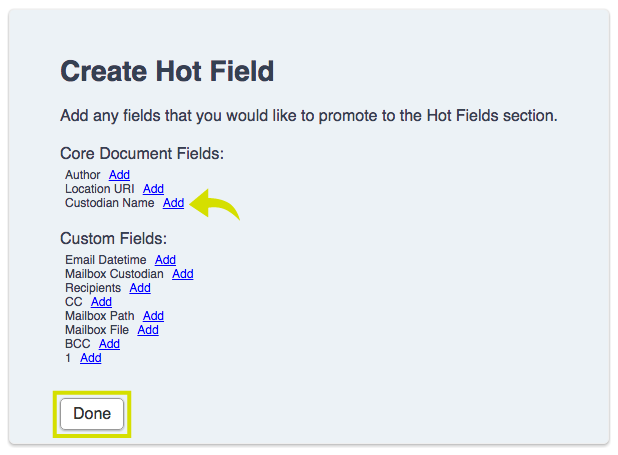
To add fields to your Hot Fields list, click Add New, select the fields you want to promote, and then click Done.
Creating Custom Fields in Discovery
*This functionality is available for Advanced users only.
Folders
Folders are used to create groups of documents that can be assigned to specific reviewers or teams of reviewers.
As documents are reviewed, check the current status of all Folders on the Discovery home page.
If a set of documents is quite large, subsets can be created. For example, "Environmental Concerns: Runoff - Review 1", "Environmental Concerns: Runoff - Review 2"...
To learn how to create Folders, click here.
Responsive Issues
Responsive Issues are used for organizing, coordinating research and enhancing communication between members of your review. Documents and designations from transcripts may have as many issues as needed, providing powerful search and reporting functionality.
For example: "Environmental" might be an Issue.
To learn how to create Responsive Issues, click here.
Confidentiality Codes
Confidentiality codes preserve the reason(s) a particular document is considered to be confidential. These codes will automatically be applied to the bottom of documents as stamp text.
For example: "Highly Confidential" might be a Confidentiality Code.
To learn how to create Confidentiality Codes, click here.
Privilege Codes
Privilege codes preserve the reason(s) a particular document is considered to be privileged.
For example: “Attorney-Client” might be a privilege code.
To learn how to create Privilege Codes, click here.
Redaction Reasons
Redaction Reasons provide an overall structure for categorizing redactions. They are also placed over the redacted text to provide an explanation for why it has been obscured.
For example: "Client-Privilege" might be a Redaction Reason.
To learn how to create Redaction Reasons, click here.
Hot Fields
Certain fields are more important than others. You need to have them front & center for viewing and editing. Hot Fields allows you to bring those fields to the forefront and keep them handy.
To learn how to create Hot Fields, click here.
Custom Fields
Our core set of document attributes covers the bases for most situations, but in many cases there is a need to add to that set.
Before creating a custom field, consider whether your goal is better suited to an Issue. If you're looking for an indicator of "Hot" (which has a yes/no answer), that may be better represented by the presence of an issue as opposed to a custom field.
To learn how to create Custom Fields, click here.
Return to Discovery Workflow
Custom Coding
*This functionality is available for Advanced users only.
You can create custom Redaction Reasons which will display in redaction boxes, and will be listed in privilege/redaction logs.
In Discovery, navigate to the the top of the home page and go to SETTINGS > Coding, scrolling down to the Redaction Reasons section. You can "Create New" to create a new Redaction Reason and Reorder them as well.
In Litigation, you will find this under More > SETTINGS > Documents.
Give the new reason a name, then click "Create".
The new Redaction Reason will now be available in your redaction interface. For more information on adding redactions, click here.
Creating Redaction Reasons
*This functionality is available for Advanced users only.
If you have certain coding fields that you will be working with extensively, you can customize your coding template to promote those particular fields as "Hot."
Your chosen fields will be promoted to the Hot Fields section in Discovery and Litigation where they will be more readily available for coding.
At the top of the main navigation in Discovery go to SETTINGS > Coding and scroll down to the Hot Fields section. If you are in a Litigation Database, Hot Fields are located under More > SETTINGS > Documents.
You can click "Add New" to add/designate one of your Custom Fields as a "Hot Field" and also Reorder the way the Hot Fields will appear in your coding panel.
If adding new fields to your Hot field list, click "Add" by fields you would like to promote in the Hot Fields section, then click "Done".
Return to Discovery Workflow or Litigation Workflow
Creating Hot Fields in Discovery
You also have the ability to "take the trash out" yourself at anytime by clicking "Delete" on any documents already in the trash. This allows you to get documents out of Nextpoint (and off your account) when you are positive that you no longer need them. Again, this will permanently delete the documents from your database.
*Please note, the Trash icon will only appear if there are documents in the trash.
To alter your Trash settings in Discovery, go to SETTINGS > General and click "Edit" in the Trash settings.
To alter your Trash settings in Litigation, go to MORE > Settings > General and click "Edit" in the Trash settings.